3D printer resolution is not a single number, and treating it like one is how people end up disappointed with otherwise capable machines. The real story sits in three places: how thin each layer can be, how fine the printer can move in the horizontal plane, and how small a feature survives in the finished part.
I’m approaching this from a practical angle, because that is what matters in plastic design and fabrication. You will come away with a clear way to read resolution specs, understand the difference between filament and resin printing, and choose settings that improve real part quality instead of just making the brochure look better.
The useful number is the one that changes the part, not the one that sounds impressive
- Layer height controls Z-axis stair-stepping, but it does not tell the whole detail story.
- In FDM, nozzle diameter, extrusion width, cooling, and speed shape fine detail as much as layer height does.
- In resin printing, pixel size helps, but optics, resin behavior, and peel forces can matter more.
- For functional parts, repeatability and fit are usually more important than the smallest possible micron value.
- The fastest quality gains often come from orientation, supports, and calibration, not from extreme settings.
What resolution means in practice
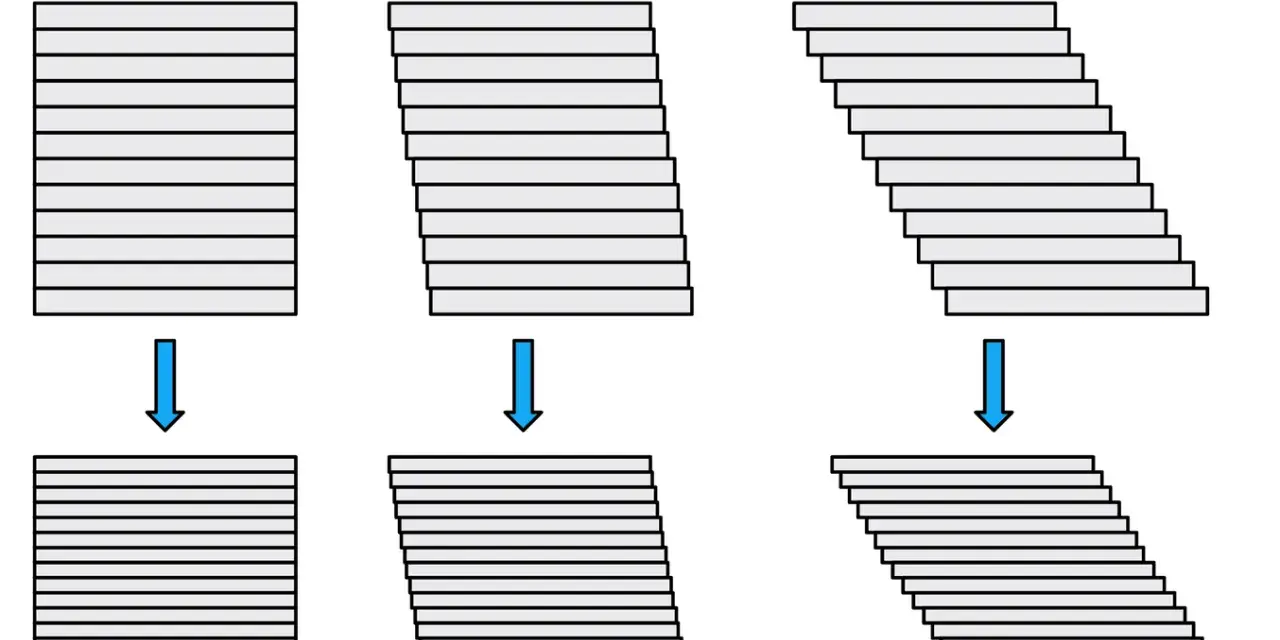
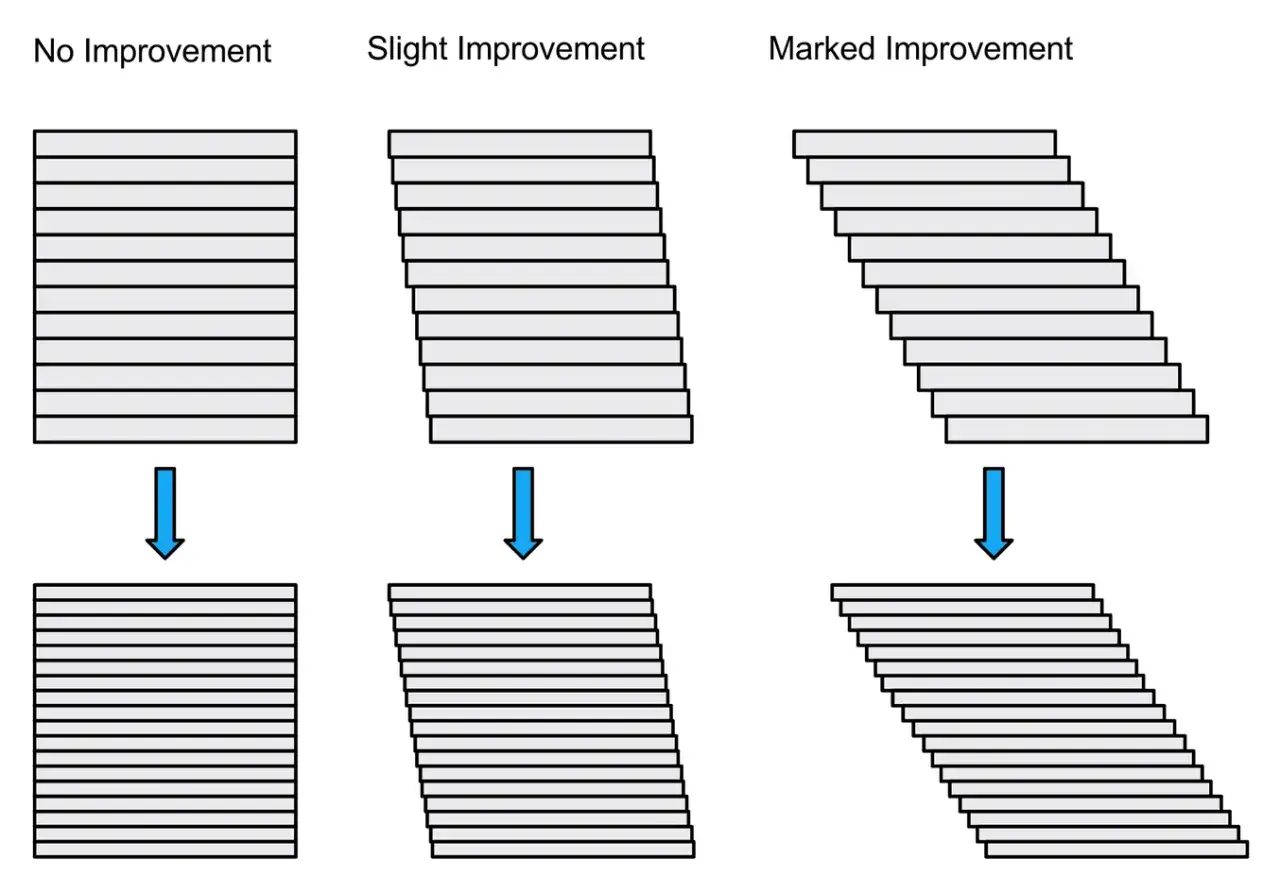
When I talk about print resolution, I separate it into three different questions. First is layer height, which is the thickness of each deposited or cured layer and mainly affects the visible “stair-step” effect on sloped surfaces. Second is horizontal detail, sometimes described as XY resolution, which is the machine’s ability to place material or cure resin accurately across the bed. Third is minimum feature size, which is the smallest wall, pin, groove, or embossed letter that actually survives the print and cleaning process.
Those three numbers are related, but they are not interchangeable. A printer can produce thin layers and still miss crisp corners. It can also have a tiny theoretical XY value and still fail on real parts because of material flow, optics, shrinkage, or poor tuning. That is why I read specs as a set of constraints, not as a single score. Once that clicks, the rest of the topic becomes much easier to judge.
The practical rule is simple: resolution is only useful if it improves the geometry you care about. If the part is a bracket, fit and strength matter more than polished slopes. If it is a display model, surface finish and small text matter more. That distinction is where the FDM and resin conversation starts to split.
Why FDM and resin behave so differently
FDM and resin printers both make layered parts, but they resolve detail in very different ways. FDM pushes molten filament through a nozzle, so the nozzle diameter and extrusion width set a hard practical ceiling on fine horizontal features. Resin printers cure liquid resin with light, so their XY detail is shaped by pixel size or laser spot size, plus the optics that deliver that light.
| Aspect | FDM printers | Resin printers |
|---|---|---|
| Typical layer height | About 50 to 400 microns | About 25 to 200 microns |
| Main detail limit | Nozzle diameter, flow, and cooling | Pixel or spot size, optics, and resin behavior |
| Best at | Functional parts, larger components, toughness | Fine detail, smooth surfaces, small features |
| Common tradeoff | Layer lines and softer edges | Post-processing, resin handling, peel forces |
For plastic fabrication work, that matters because the right technology is often the one that matches the job, not the one with the smallest headline spec. Once you see the difference between these two families of printers, it becomes easier to tune each one properly.
How to tune FDM for sharper detail
With FDM, I start by matching layer height to nozzle diameter. Prusa’s guidance that layer height should stay below roughly 80 percent of nozzle diameter is a sensible rule of thumb, and it explains why a 0.4 mm nozzle usually tops out around 0.32 mm layer height. For fine work, though, I would usually stay lower than that, often in the 0.12 to 0.20 mm range, because the visible finish improves long before you hit the theoretical maximum.
- Use a smaller nozzle when detail really matters. A 0.2 mm to 0.4 mm nozzle is better for crisp edges than a 0.6 mm or 0.8 mm nozzle, but it will increase print time and clog sensitivity.
- Keep the first layer generous. A 0.20 mm first layer is common because it improves adhesion even when the rest of the print uses a finer layer height.
- Slow down outer walls. Corner sharpness and surface quality usually improve more from slower perimeters than from obsessing over an extra 20 microns.
- Use variable layer height where possible. It saves time on straight sections while preserving detail on curves and transitions.
- Watch cooling and extrusion consistency. Small details blur fast when the plastic is still soft or the flow rate is unstable.
- Orient the model intentionally. If you can move fine text or visible surfaces away from steep overhangs, the print usually looks cleaner with less post-processing.
The important limit is that better settings cannot fully override geometry. Thin embossed details, tiny holes, and narrow walls are still constrained by nozzle size and extrusion behavior. In practice, FDM can look very good, but it rewards disciplined tuning more than brute-force reduction in layer height.
That is the point where resin starts to look tempting, because it solves some surface-detail problems more directly, but it brings a different set of tradeoffs instead of a free upgrade.
What limits detail on resin machines
Resin printers often look like they have the advantage because they produce smooth parts with very fine visible detail. MSLA machines, in particular, use an LCD screen to mask light, so the printed object inherits a fixed XY grid from that screen. DLP and laser-based systems work differently, but they share the same basic truth: the light source and optical path control the smallest horizontal detail, not just a single marketing number.
That is why smaller pixels are helpful but not sufficient. The cured shape can be softened by light spread, resin properties, anti-aliasing, and the mechanical force needed to peel each layer from the vat. I’ve seen this play out often enough to be cautious about claims that “smaller pixels equal better parts.” In reality, a printer with a slightly larger pixel can still produce excellent accuracy if the optics and process are better controlled.
Layer thickness is also only part of the story. Resin printers commonly work somewhere between 25 and 200 microns, but going thinner is not automatically better. Thinner layers can reduce visible stepping on curves, yet they also slow the print and may not improve dimensional accuracy if the rest of the system is not tuned well. After washing and curing, parts can still shift slightly, so post-processing is part of the resolution conversation too.
My practical read is this: resin wins when the part needs fine surface detail, small text, or smooth contours. It loses some ground when the part needs toughness, large build volume, or quick, low-maintenance production. That tradeoff is exactly why the next question should be about the part itself, not the printer spec sheet.
Choose a resolution target by part type
If I am deciding what “good enough” looks like, I start with the part’s role. Cosmetic models, fit-critical assemblies, embossed labels, and functional fixtures all need different levels of detail. Chasing the same setting for every job is a good way to waste time.
| Part type | Practical starting point | Why it makes sense |
|---|---|---|
| Cosmetic prototype | FDM at 0.12 to 0.20 mm, or resin at 50 to 100 microns | Surface quality matters, but the part is not usually under load |
| Snap-fit enclosure | FDM at 0.16 to 0.24 mm with careful calibration | Fit and repeatability matter more than ultra-fine visual detail |
| Embossed text or labeling | Resin at 25 to 50 microns, or FDM with a 0.2 mm nozzle and fine layers | Edges need to stay crisp so the text reads cleanly |
| Miniatures or micro details | Resin with strong supports and thin layers | Small features and smooth curves benefit most from resin detail |
| Jigs, fixtures, and brackets | FDM at 0.20 to 0.28 mm, often with a 0.4 to 0.6 mm nozzle | Strength, speed, and consistency usually beat ultra-fine detail |
If the part will be sanded, painted, vapor-smoothed, or machined later, I would usually prioritize stable geometry over the smallest possible layer height. A part that prints consistently and finishes cleanly is more valuable than a part that looks great only in the slicer preview. That judgment leads directly to the mistakes I see most often.
The mistakes that make low resolution disappoint
The most common mistake is chasing tiny layer heights before fixing the basics. If the printer is under-extruding, poorly leveled, or too fast for the material, thinner layers just produce thinner bad results. The second mistake is confusing nozzle size with layer height. A smaller layer height does not magically turn a 0.8 mm nozzle into a detail machine.- Running very fine layers on a badly calibrated machine and expecting a clean result.
- Ignoring the nozzle size or pixel size that actually limits the part geometry.
- Printing too fast and sacrificing corner sharpness for a resolution number that looks good on paper.
- Leaving supports and orientation as an afterthought, then blaming the printer for scarred surfaces.
- Assuming post-processing can fix poor dimensional accuracy instead of only improving appearance.
I also see people overestimate how much resolution alone affects fit. A part can look smooth and still be slightly undersized or oversized where it matters. For engineering pieces, the better metric is often repeatable dimensional accuracy, not visual smoothness. That is the final lens I use when I compare machines, because it cuts through the marketing quickly.
The four numbers I trust more than marketing claims
When I evaluate a printer for plastic design work, I care more about four practical numbers than any single headline resolution figure. First is the nozzle diameter or pixel size, because that sets the basic geometry limit. Second is the layer-height range the machine can actually hold without becoming unstable. Third is the minimum feature size that survives real parts, not just lab samples. Fourth is repeatability after calibration, because the same part has to come out the same way twice.
- Nozzle or pixel size tells me the rough detail ceiling.
- Usable layer heights tell me how much time I can save without wrecking the surface.
- Minimum feature size tells me whether text, pins, walls, and slots will actually work.
- Repeatability tells me whether the machine is suitable for real design iteration, not just one showcase print.
That is the version of resolution I trust in practice: not a single spec, but a chain of limits that ends in a usable part. If you read a printer that way, you can choose settings, materials, and technology with much better judgment, and the result is usually a part that fits, looks right, and behaves the way the design intended.