Small-run plastic programs live or die on timing, tooling risk, and whether the part is actually ready for a hard tool. I treat low volume plastic injection molding as a way to get production-grade parts without betting the whole project on a steel mold too early. This guide explains where the process fits, what drives cost and lead time, how to design parts that mold cleanly, and when thermoforming is the smarter choice.
The decision comes down to volume, geometry, and tooling risk
- Low-volume injection molding is best when you need real production parts, tighter tolerances, and a path from prototype to bridge production.
- The mold material matters. Aluminum tools usually reduce upfront cost and shorten lead time compared with hardened steel.
- Tooling is the main budget driver, so part complexity, finish, and cavity count can change the quote fast.
- Thermoforming usually wins for larger, simpler parts when you want lower tooling cost and faster changes.
- Good DFM work before tool release is often the difference between a clean launch and an expensive rework cycle.
When low-volume molding makes business sense
I usually think about short-run injection work in terms of risk reduction, not just quantity. If demand is still uncertain, if the design may change, or if you need parts that behave like final production parts, low-volume injection molding gives you a controlled way to move forward without locking into a full steel-tool investment.
In practice, that means anything from a few hundred units to a few thousand, and sometimes into the low tens of thousands when the tool is meant to bridge into production. The best fits are often pilot launches, market tests, service parts, preproduction medical or industrial components, and products where tolerance and repeatability matter more than the absolute cheapest per-part price.
The key point is that this is not prototype-only tooling. A short-run tool can produce functional, saleable parts that let you validate fit, function, packaging, and demand before you commit to a much larger program. Once you see the process as a bridge rather than a stopgap, the rest of the decision becomes easier. The next step is the mold cycle itself, because the way the part is formed explains why some projects are cheap and others are not.
How the process works from pellets to parts
The workflow is straightforward, but each step has cost and quality implications. For a small run, I still want every stage handled as if the part were going to full production, because sloppy early decisions become expensive quickly.
- Resin selection and prep - The right thermoplastic is chosen for strength, temperature resistance, appearance, or chemical compatibility. Some resins need drying before molding.
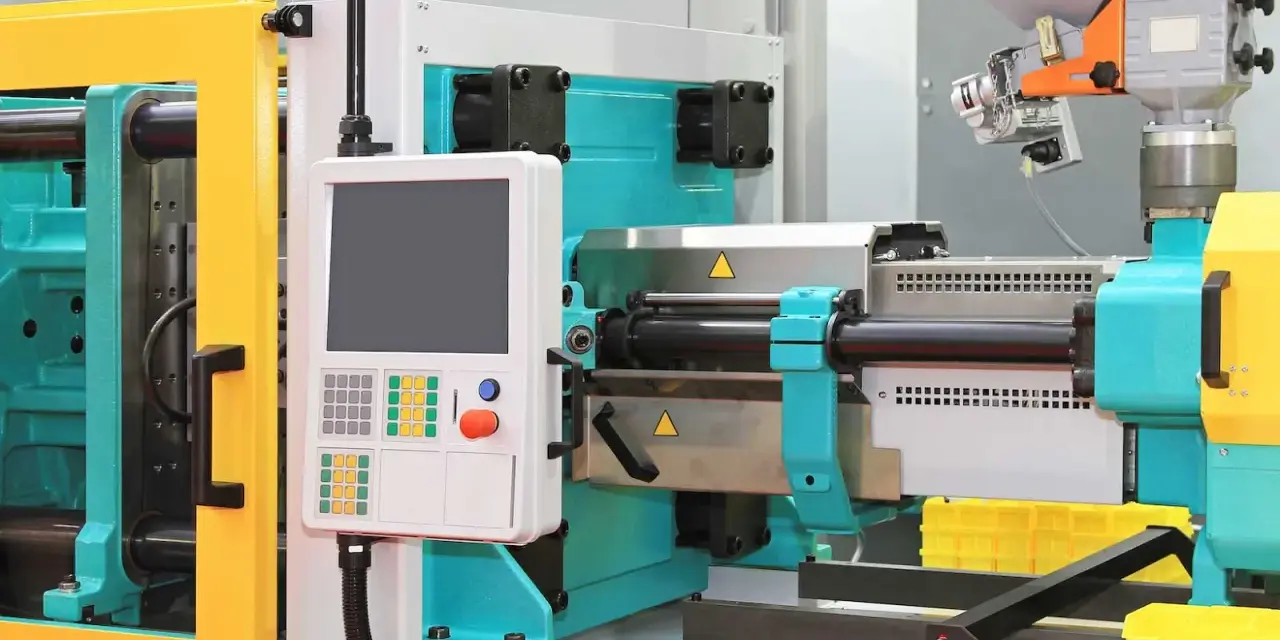
- Tooling - The mold is machined, often in aluminum for short runs. Single-cavity tools are common when the goal is flexibility, while multi-cavity tools make sense only when the geometry and demand justify them.
- Injection - Pellets are melted and pushed into the cavity under pressure. The mold is then held closed while the part cools and solidifies.
- Ejection and trim - The part is released, then any gate vestige, flash, or trim line is cleaned up if needed.
- Inspection - Critical dimensions are checked, especially on parts with snap-fits, sealing surfaces, bosses, or cosmetic faces.
That flow is simple on paper, but it is also why mold design matters so much. A mold that is easy to machine and easy to eject from will usually be cheaper to run and easier to repeat. Once that flow is clear, the real question becomes where the cost sits: in the tool, the part, or the changes you ask for.
What actually drives cost and lead time
The main mistake I see is comparing per-part price before tooling has been amortized. That comparison is almost always misleading. For short runs, the tool often dominates the economics, which is why the mold style and complexity matter more than many teams expect.
Formlabs notes that a metal mold can take roughly four to eight weeks to make and can range from about $2,000 to $100,000+ depending on shape and complexity. In day-to-day project planning, I usually think in three bands: prototype molds at about 2 to 6 weeks, bridge molds at about 4 to 10 weeks, and production molds at about 8 to 20+ weeks. Those ranges move with part complexity, cavity count, surface finish, and how much validation the job requires.
| Cost driver | What it changes | Practical takeaway |
|---|---|---|
| Mold material | Aluminum usually lowers upfront cost and speeds machining; steel adds durability and long-run life. | Use aluminum when you need good parts now, not a tool that must survive years of heavy volume. |
| Geometry | Undercuts, deep ribs, side actions, and hidden features add machining and assembly work. | Simplify the part before you ask for a cheaper quote. |
| Surface finish | High-gloss or textured finishes increase polishing and tool time. | Only specify the finish the product actually needs. |
| Cavity count | More cavities lower piece price, but raise tooling cost and complexity. | Single-cavity is often the right default for a short run. |
| Inspection and validation | Sampling, CMM checks, and CTQ reviews add time, but reduce launch risk. | Budget for verification, not just machining. |
Lead time is rarely just machining time. It is also quoting, DFM feedback, material selection, sampling, and the back-and-forth that happens when a part is almost right but not quite ready. Those cost levers only stay manageable if the CAD file is built for molding rather than treated as a generic 3D model.
Design details that keep quotes under control
If I had to reduce short-run molding design to a few rules, I would keep them practical and boring. The boring version is usually the profitable one.
- Keep wall thickness consistent - A common working range is about 0.040 in. to 0.140 in. (1 to 3.5 mm). Thick sections tend to sink, warp, and cool unevenly.
- Add draft early - Around 1 to 2 degrees on smooth vertical walls is a sensible baseline. Textured or deep features usually need more.
- Use radii instead of sharp corners - Rounded internal corners reduce stress and make machining easier.
- Limit undercuts - They often require slides, lifters, or hand operations, which raise cost and complicate repeatability.
- Do not overspec the finish - A mirror-like cosmetic surface sounds nice, but it costs time. Choose the least expensive finish that still works for the application.
- Mark critical dimensions clearly - If a hole, boss, or sealing face is truly critical, call it out in the CAD and quoting process instead of assuming the shop will infer it.
I also push for an actual DFM review before any tool is cut. That is where you catch the expensive surprises, such as a rib that is too thick, a wall that will not eject cleanly, or a cosmetic surface that does not justify the added polishing time. Even with a good design, thermoforming can still be the better business move for certain shapes and volumes.
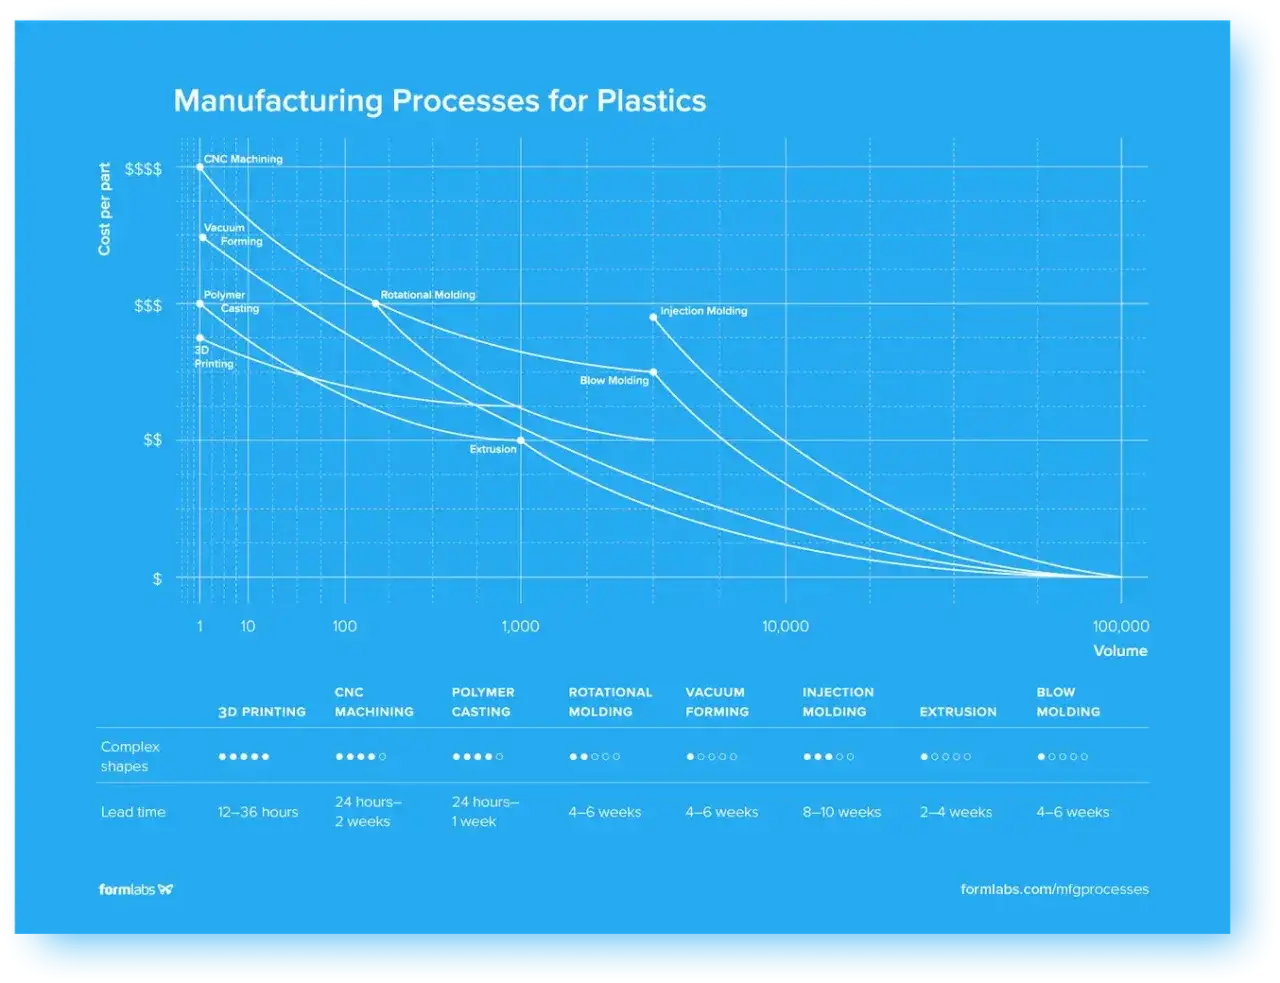
When thermoforming is the smarter low-volume choice
I treat thermoforming as the main alternative because it solves a different problem. It forms sheet, not pellets, and that difference usually makes it better for large, shallow, or visually simple parts where tooling cost matters more than ultra-fine detail.
Productive Plastics' comparison puts thermoforming ahead below roughly 3,000 to 5,000 parts for a large part, while injection molding becomes more competitive beyond that point. That crossover is not a law, but it is a useful planning signal. If your part is big, the geometry is gentle, and the run is still small, thermoforming often gives you a better total project cost.
| Criterion | Low-volume injection molding | Thermoforming |
|---|---|---|
| Best for | Small to medium parts with tighter tolerances and more detail | Large, shallow, simpler parts with lower detail requirements |
| Tooling | Two-sided mold, often aluminum for short runs | Simpler, usually lower-cost tooling, often single-sided |
| Lead time | Longer than thermoforming, but much faster than a full steel program | Usually faster to tool and easier to modify |
| Per-part economics | Improves as volume rises and the tool is amortized | Often better in low-to-mid volumes, especially for larger parts |
| Typical limits | Higher upfront risk and more expensive design changes later | More trimming, more thickness variation, and less fine detail |
Thermoforming is not a downgrade. For the right part, it is simply the smarter process. I reach for it when the design is large enough that injection tooling feels disproportionate, or when quick iteration matters more than microscopic geometric control. From there, choosing a supplier is mostly about who can validate the decision quickly and honestly.
How I would choose without overbuying tooling
If I were deciding on a new program today, I would run it through a simple filter before asking for quotes.
- Choose injection molding if the part is small, detailed, tolerance-heavy, or needs repeatable cosmetic consistency.
- Choose thermoforming if the part is large, relatively shallow, and the run is still modest.
- Ask for bridge tooling if demand is uncertain but you need production-quality parts now.
- Insist on DFM feedback before tool release, not after the first bad sample.
- Match the finish to the function so you do not pay for polish the product will never use.
- Plan the scale-up path so a short-run tool does not trap you when volume grows.
For U.S. projects, I care less about who promises the lowest piece price and more about who can move from quote to clean sample without drama. A good partner will tell you when a part should be molded, when it should be thermoformed, and when the design needs another pass before either process makes sense. That honesty usually saves more time and money than a slightly cheaper first quote.