Coloring a laser-engraved surface is mostly a matter of matching the fill method to the material. Wood, acrylic, anodized aluminum, glass, and coated plastics all react differently, so the same paint or resin can look crisp on one part and messy on another. The practical answer to how to color laser engraving is to choose the right fill, then prep the surface so the color stays inside the cut.
What matters most before you start
- Material decides the method. What works on wood can fail on acrylic or anodized aluminum.
- Masking and cleaning matter more than the fill itself. Most bleed problems come from poor prep.
- Water-based acrylic is the safest default. It is easy to apply, easy to clean, and works on many shop projects.
- Epoxy is the premium option. It gives a deeper, glossier look when the engraving has enough depth.
- Allow for cure time. Many acrylic fills are workable in 15-30 minutes and fully harden overnight; epoxy usually needs 24-72 hours.
- Test on scrap first. Plastics in particular can craze, stain, or soften if the chemistry is wrong.
Choose the fill method by material
I start by separating surfaces into porous, smooth, and coated. Once you do that, the choice gets much easier: porous materials need control over bleed, smooth plastics need chemistry that will not attack the surface, and coated metals need a fill that grabs the engraved pocket without lifting the finish around it. For small shop work, consumables usually land around $5-$15 for simple acrylic fills and $10-$30 for epoxy-based work on a small project.
| Surface | Best fill method | Why it works | Main caution |
|---|---|---|---|
| Wood | Masked acrylic paint fill or stain plus clear coat | Wood accepts color well and the engraved pocket helps hold it | Open grain can cause bleed and fuzzy edges if the mask is poor |
| Cast acrylic | Water-based acrylic paint or pigmented epoxy | Clean pockets and smooth edges can stay sharp with the right chemistry | Hot solvents can craze or cloud the plastic |
| Anodized aluminum | Paint fill or epoxy fill | The engraving creates a pocket that holds color against the anodized layer | Surface must be degreased well or the fill can flake out |
| Glass and stone | Wax, acrylic paint, or pigment fill | Contrast matters more than thickness, so the recess only needs visible color | Overfilling makes cleanup slow and messy |
| Powder-coated metal | Paint fill or powder-coat fill | The engraved pocket can be refilled cleanly if the coating is cut through well | Deep, hard edges are easier to fill than tiny serif text |
If you want the whole part tinted instead of just the engraved recess, pre-coloring the blank can make more sense than a post-engrave fill. I use that route when the engraved detail is secondary and the base color should carry most of the visual weight. Once the material choice is clear, the next step is getting the workflow clean and repeatable.
A clean workflow that keeps the edges sharp
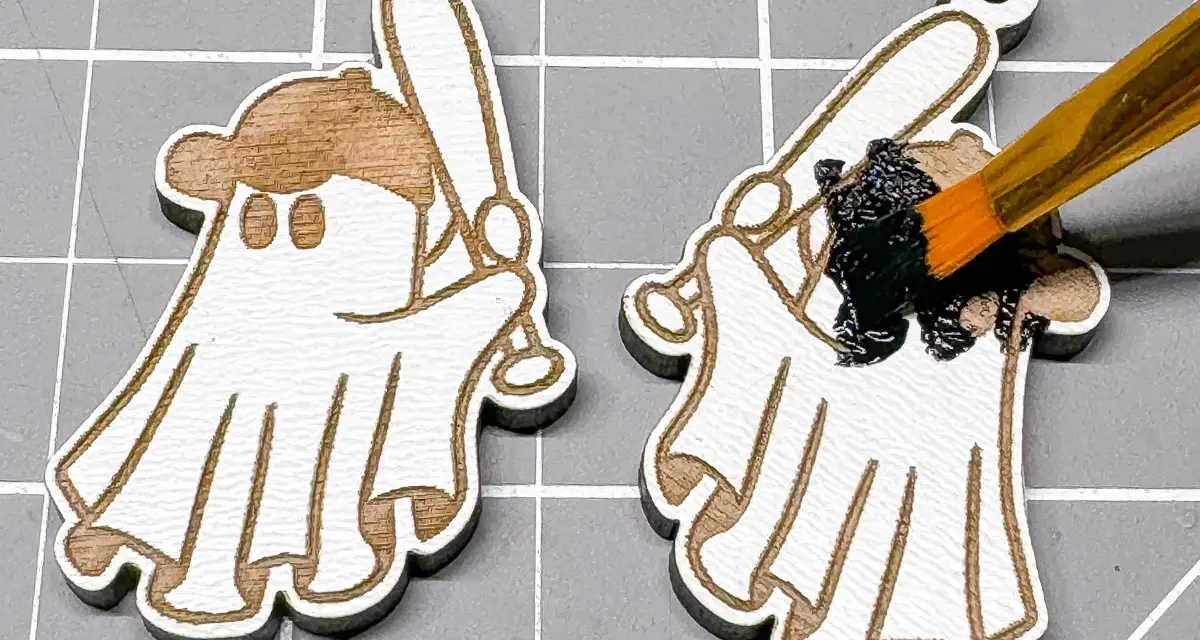
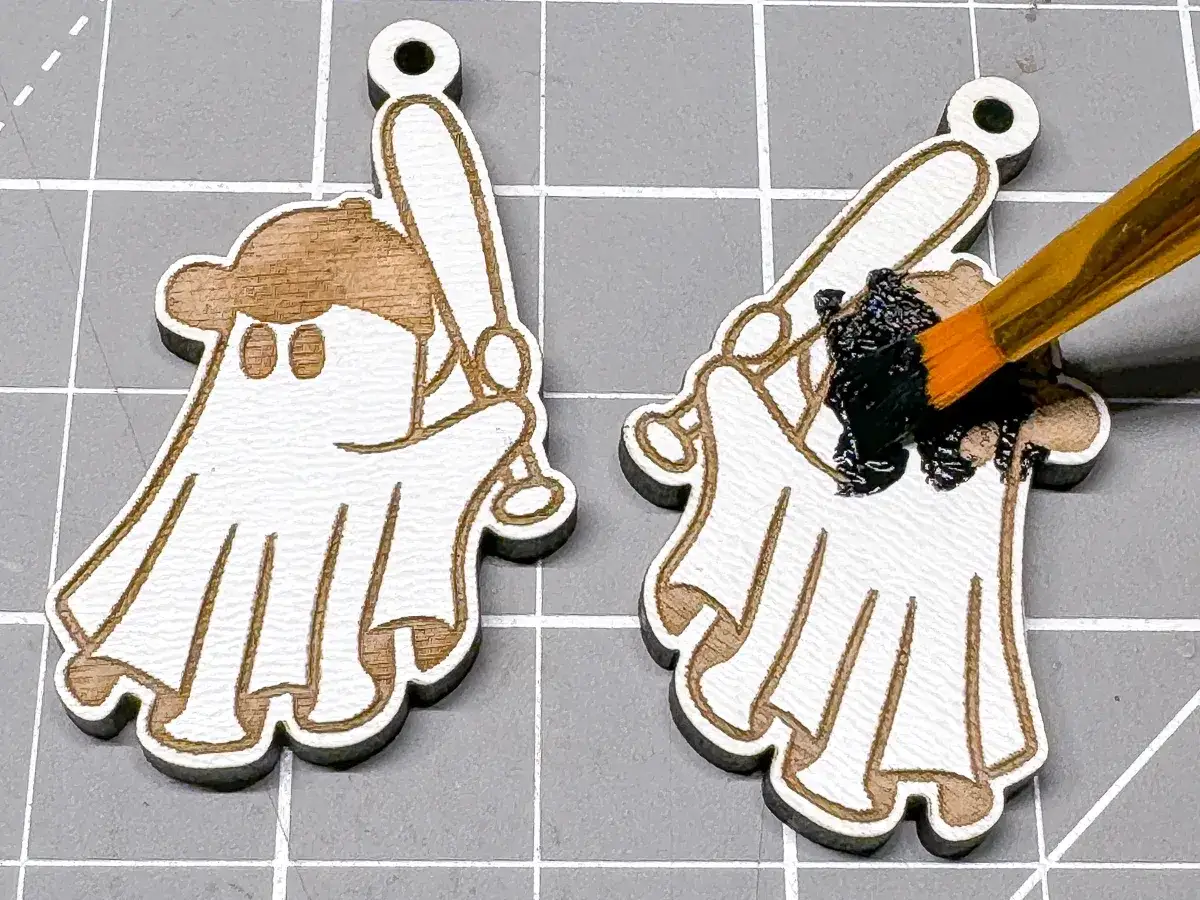
My default process is simple, because complicated fills usually fail in the same places: dust, shallow engraving, rushed cleanup, or the wrong drying time. I want the color to sit below the surface, not skim across it, and I want the edges to stay crisp when I level the fill.
- Test on scrap first. That is especially important on plastics, where one wrong solvent can ruin the surface.
- Clean and degrease the workpiece. Finger oil, smoke residue, and sanding dust all weaken adhesion.
- Mask the face if you need a sharp border. Burnish the tape down so the fill cannot creep under the edge.
- Engrave deep enough to hold color. A shallow scratch will not keep the fill below the finish line.
- Apply the color in thin passes. I prefer to overfill slightly, then level it back to the surface.
- Let it set before cleanup. Many acrylic fills can be leveled after 15-30 minutes, while epoxy often needs 24-72 hours before sanding or heavy handling.
- Finish only after full cure. A clear coat over soft fill traps fingerprints, haze, and edge damage.
For fast production, I usually reach for a water-based acrylic because it is forgiving and easy to clean up. For premium signs or deeper recesses, pigmented epoxy gives a richer, more dimensional look. The workflow changes a little by material, but the sequence stays the same: prep, fill, level, cure, and protect.
Masking is worth it when the design gets small
Masking is not mandatory, but I treat it as a serious advantage whenever the artwork contains thin strokes, small text, or high contrast between the background and the fill. It helps on wood because it reduces bleed into the grain, and it helps on coated metals because it keeps the fill from wandering onto the face of the part. On acrylic, I use a gentler mask so the adhesive does not leave a residue that is harder to remove than the fill itself.
- Burnish the tape hard. A loose edge is where bleed starts.
- Use a fresh blade or scraper for cleanup. Dull tools lift fill and scar the edge.
- Peel slowly after the fill begins to skin. Pulling too early can drag color out of the pocket.
- Choose low-tack mask on delicate plastics. Aggressive adhesive can mark the surface.
- Re-seal porous wood if needed. A light sealer coat before masking can save a lot of cleanup.
Masking takes more time up front, but it pays for itself when the engraving has fine detail or when you need repeatable results across a batch. The tradeoff is that you now have another surface layer to manage, which is why so many bad fills come from the finishing step rather than the fill itself.
The mistakes that blur the engraving
Most failed color fills are not caused by the colorant. They are caused by how the surface was cut, cleaned, or leveled afterward. I see the same problems again and again, and once you know them, they become much easier to avoid.
- Engraving too shallow. If the pocket is barely there, the color rides on top instead of sitting inside the detail.
- Using the wrong chemistry. Strong solvents can craze acrylic, soften adhesives, or stain the face of the part.
- Overfilling too aggressively. A huge mound of paint or epoxy is harder to level cleanly and often smears into the edges.
- Rushing the cure. If the fill is still soft, sanding or wiping it back will pull color out of the recess.
- Ignoring dust and smoke residue. Laser soot creates a weak bond and gives the fill a dirty edge.
- Picking a low-contrast color. A beautiful fill can still disappear if it is too close to the base color.
- Over-sanding the face. The goal is to level the fill, not polish the design out of existence.
When I troubleshoot a bad result, I usually fix the prep before I change the fill material. That is the faster move nine times out of ten. Once the pocket is clean and the fill is mechanically stable, the final question is how to keep the color looking good after handling and exposure.
Make the color last without dulling the engraving
Durability depends on where the part will live. A decorative plaque on a wall does not need the same protection as a nameplate on a tool, a bottle, or an outdoor sign. I think in terms of abrasion, moisture, and UV exposure, then choose the finish from there.
| Finish | Best use | What to watch for |
|---|---|---|
| Waterborne clear coat | Wood and some indoor decorative pieces | Low odor and easy cleanup, but it needs compatibility testing |
| Acrylic clear | Acrylic and many plastics | Can haze or craze sensitive plastics if the formulation is too hot |
| Two-part urethane or automotive clear | High-wear metal parts and outdoor signage | Very durable, but the chemistry is stronger and less forgiving |
| No topcoat | Low-touch samples and short-run display pieces | Fastest option, but also the least protected |
For outdoor parts, I want a fill and topcoat that can handle UV without yellowing or chalking too quickly. For wood, I prefer to let the fill fully cure, then add two light coats instead of one heavy coat. Heavy coats tend to pool in the engraving and soften the sharpness you just worked to create.
The setup I trust for most shop work
If I had to standardize one workflow for most indoor plaques, product tags, and decorative panels, I would use a masked acrylic paint fill on a well-prepared engraving. It is the most forgiving combination, it keeps costs low, and it produces a clean result without demanding specialty equipment. When the design has more depth or needs a richer finish, I move to pigmented epoxy; when the part needs serious abrasion resistance or outdoor durability, I stop trying to force a soft fill to behave like an industrial coating.
That is the most reliable answer to how to color laser engraving in real shop work: match the fill to the surface, make the engraving deep and clean enough to hold it, and give the color the cure time it needs before you touch it again.