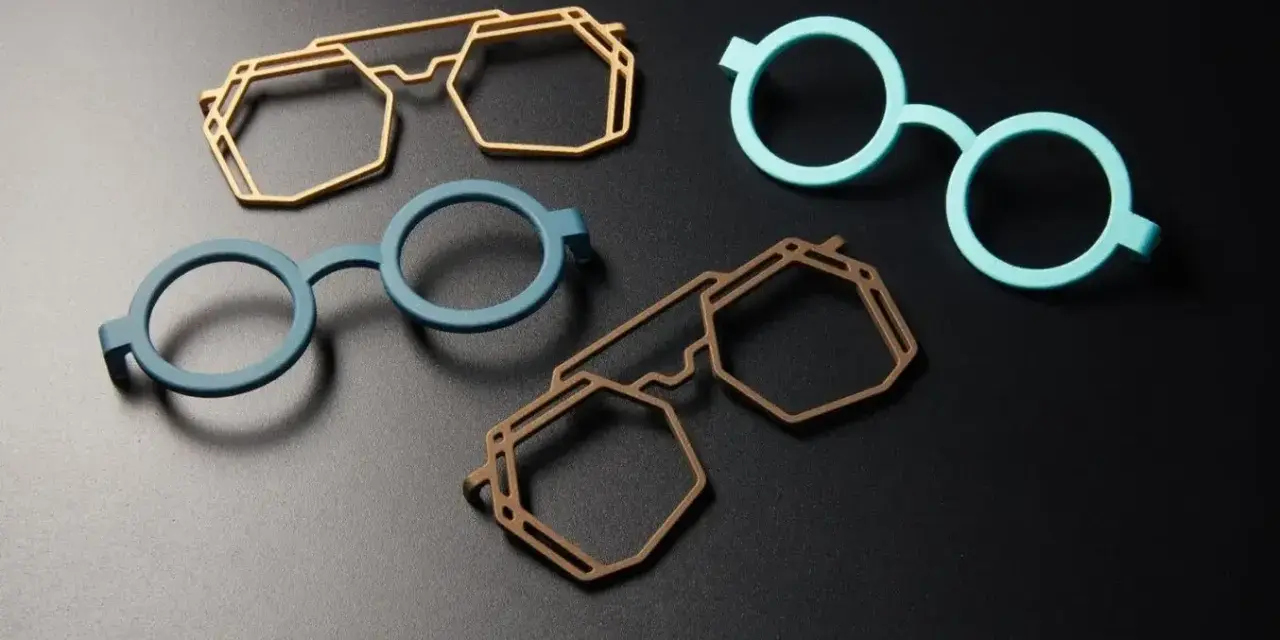
3D printing glasses frames has moved from novelty to a serious manufacturing option for brands that need lighter prototypes, custom fit, and low-volume production. The real value is not just visual freedom; it is the ability to iterate quickly, tune fit around the wearer’s face, and skip expensive tooling when demand is still uncertain. In this article I focus on the print processes, materials, finishing steps, and design decisions that make eyewear work in practice, not just in a render.
What matters most before you print eyewear
- SLS nylon is usually the best all-around choice for functional frames.
- SLA is better for smooth-looking prototypes than for long-term wear.
- Fit, hinge design, and finishing matter as much as the printer.
- Small batches make sense when style changes quickly or each frame needs customization.
- Post-processing is what turns a decent print into something that feels premium on the face.
Why additively made eyewear is worth serious attention
When I evaluate eyewear programs, I start with the business problem, not the printer. Frames are a strong fit for additive manufacturing when you need design freedom, short lead times, or individualized fit. That is why the technology is attractive for independent brands, smart eyewear, performance frames, and made-to-order collections where the old mold-and-tooling model becomes too slow or too expensive.
- Custom geometry lets you adjust bridge width, temple angle, or frame curvature for a specific wearer.
- Lower waste comes from building only the material you need instead of milling away excess plastic.
- Faster iteration makes it practical to test several frame versions before locking a final shape.
- Complex features such as integrated hinges, sensor housings, or lattice details are easier to attempt in CAD than in tooling.
The limits matter just as much. If you are selling a basic, high-volume acetate shape with little variation, injection molding still has a strong economic case. Additive manufacturing wins when the product needs variety, speed, or personalization more than absolute unit cost at massive scale. That tradeoff is what makes the next choice so important: the printing process itself.
Which printing process fits the job
Not every 3D printer makes a good pair of glasses. For eyewear, I usually narrow the field to three routes: powder-bed nylon, resin printing, and filament printing. The right choice depends on whether you are making a frame that will be worn every day, or one that only needs to prove the shape and look.
| Process | What it does well | Where it falls short | Best use case |
|---|---|---|---|
| SLS nylon | No support structures, strong frames, good for complex geometry and batch production | Needs depowdering and finishing; the surface starts rougher than polished acetate | Functional end-use frames, custom batches, smart eyewear |
| SLA resin | Fine detail, smooth visuals, excellent for looks-like prototypes | Can be more brittle and less suited to long wear unless finished and protected | Design validation, color studies, show samples |
| FDM | Cheap, fast, and useful for rough fit checks and jigs | Visible layer lines, weaker finish, less premium feel | Early concept models and non-customer-facing tests |
If I had to simplify the recommendation, I would put it this way: SLS is the safest default for wearable frames, SLA is the strongest option for appearance prototypes, and FDM is mostly a concept tool. Powder-bed nylon also avoids support scars, which is a bigger deal than many teams expect when a frame has thin temples or undercuts. Once the process is chosen, the material and finish decide whether the result feels like real eyewear.
Materials and finishing determine whether it feels like eyewear
The material choice is where many teams over-simplify the problem. For functional frames, I would focus on PA11 and PA12 nylon powders first, because they combine strength, flexibility, and good skin-contact behavior. These materials are thermoplastics, so they can be heat-adjusted after printing in a way that feels familiar to optical shops that already work with acetate-like materials.
- PA11 is the more ductile option, which makes it attractive when you want impact resistance and a little more flex.
- PA12 is a balanced production material with broad industry use and stable mechanical behavior.
- White PA12 is the best starting point when you want brighter dye colors or a lighter-looking frame.
Surface finish is just as important as the raw polymer. A frame can be mechanically sound and still feel unfinished if the surface looks grainy or if layer artifacts catch the light. In practice, I like to think in terms of a finishing stack: orientation, tumbling, dyeing, and coating. A few hours in a vibratory tumbler can dramatically improve the touch and reduce roughness, while vapor smoothing or a coating can push the part closer to a polished retail finish.
Color is another place where material choice matters. Dark gray nylon powders can be dyed, but the result often looks muted compared with white powder, which gives a cleaner canvas for saturated colors. If the brand wants a deep gloss, a more technical coating can help; if it wants a matte, fashion-forward surface, controlled tumbling and dyeing may be enough. The important thing is to design the finish strategy early, not as an afterthought.
Once the material and finish are decided, the frame itself has to be designed so the printer can actually produce what the wearer needs.
Design the frame for the face, the hardware, and the printer
I would never start with a wild shape and then hope the fit solves itself later. Eyewear is unforgiving: a frame can look great in CAD and still pinch the nose, slide on the bridge, or feel top-heavy on the temples. Good design begins with wearability, then moves into printability, and only then settles on styling details.
Start with fit, not aesthetics
Bridge width, temple length, front curvature, and lens placement all affect comfort. If you can, test the frame on more than one face shape before finalizing the design. A small prototype panel or a single fit model will tell you more than a polished render ever will. I also like to check how the frame behaves after a full day of wear, because pressure points often show up only after several hours.
Build in hardware that can survive real use
Hinges and fasteners are common failure points, especially when a frame is adjusted often. For printed nylon frames, heat-set inserts or tapped threads are usually more durable than relying on raw printed threads alone. Keep stress concentrated in reinforced zones, not in decorative geometry. If a temple needs to flex, give it a designed flex zone instead of hoping the material will “sort itself out.”
Read Also: Advanced 3D Printing - From Prototype to Production
Use orientation and clearance as design tools
Build orientation changes both the finish and the efficiency of the print. A 45-degree orientation is often a sensible starting point for eyewear because it balances surface quality and chamber packing. As a practical rule of thumb, I treat 0.3 mm clearance as a starting point for small moving features and 0.6 mm for larger ones, then validate them on the actual machine and finish process you plan to use. Those numbers are not universal, but they are far more useful than guessing.
One more detail is easy to overlook: texture can help hide layer artifacts. A subtle embossed or debossed surface on the temples can make the frame look intentional instead of visibly printed. That is the kind of small design move that separates a demo part from a product.
Once the design is ready, the next question is whether to build the frames in-house or hand the work off to a production partner.
Prototype first, then decide whether to print in-house or outsource
For eyewear, production strategy is often a volume question disguised as a design question. If you need to move fast from CAD to market, a dedicated partner can be the simplest path. One large eyewear production line reports that it can handle 1 to 10,000 frames and beyond, and that if you already have a ready CAD file plus a defined materials-and-finish stack, a collection can move to market in about three months. That is a real advantage when you are testing a new line or building a customized offer.
| Approach | Best for | Tradeoffs | My take |
|---|---|---|---|
| In-house production | Repeated iteration, confidentiality, and ongoing demand | Higher upfront spend, staffing, maintenance, post-processing discipline | Worth it if eyewear is becoming a core product line, not a side experiment |
| Outsourced service bureau | Low-volume testing, launch validation, and early market experiments | Higher per-part cost and less direct control | Best when you want speed without committing to a full factory setup |
For teams that want to print in-house, I would treat the equipment decision carefully. A reference SLS ecosystem from Formlabs, including the printer, post-processing unit, media blaster, two build chambers, material, and support, is listed at $64,190. That is not the only way to build an eyewear cell, but it is a useful reality check for anyone comparing in-house versus outsourced production.
My practical rule is simple: outsource the first versions, then bring production in-house only if iteration speed, confidentiality, or volume justify it. That sequence keeps risk low and prevents teams from buying hardware before the product is proven. Once the operating model is clear, the remaining mistakes are usually avoidable.
The mistakes that make printed frames fail after the first wear
I see the same problems again and again: teams obsess over shape, then ignore fit, surface finish, and post-processing. That is backwards. A frame needs to survive daily handling, not just a product photo. The table below captures the failures I would watch for first.
| Mistake | What it causes | Better approach |
|---|---|---|
| Choosing FDM for a final consumer frame | Visible layer lines and a less premium feel | Use it for early fit checks, then move to powder-bed nylon or resin |
| Designing for looks before comfort | Nose pressure, slipping, or fatigue at the temples | Test fit on multiple faces and wear the prototype for a full day |
| Ignoring the hinge area | Cracking, loosening, or repeated adjustment failures | Reinforce stress zones and use durable hardware interfaces |
| Skipping finishing work | Rough touch, visible print texture, and weak premium appeal | Plan tumbling, dyeing, smoothing, or coating from the start |
| Underestimating material behavior | Frames that feel stiff, brittle, or too soft in use | Match the nylon grade and finish to the real wearing conditions |
The biggest hidden mistake is assuming a good CAD file automatically becomes a good frame. It does not. The part has to be designed for heat, sweat, flex, repeated handling, and whatever kind of finish the brand wants to sell. That is why I keep pushing teams to test real samples early, not just screenshots.
What I would do before launching a frame line
If I were starting a new eyewear program today, I would keep the first launch narrow and disciplined. I would choose one powder-bed nylon, one finish workflow, and one clear fit target. Then I would print, wear-test, refine, and only after that widen the assortment. The goal is not to make the most complex frame possible; it is to make a frame that people actually want to keep on their face.
- Pick one printing route and make it consistent before chasing extra options.
- Validate fit on multiple faces, not just the model used in CAD review.
- Decide on the finish early, because color, texture, and coating change the product’s feel.
- Use printed prototypes to learn where the frame flexes, rubs, or loosens over time.
The most successful additively made eyewear is usually the least flashy from a manufacturing standpoint: a sensible nylon, a clean fit, a controlled finish, and a production plan that matches demand. Get those four things right, and the printer becomes a real design tool rather than a gimmick.