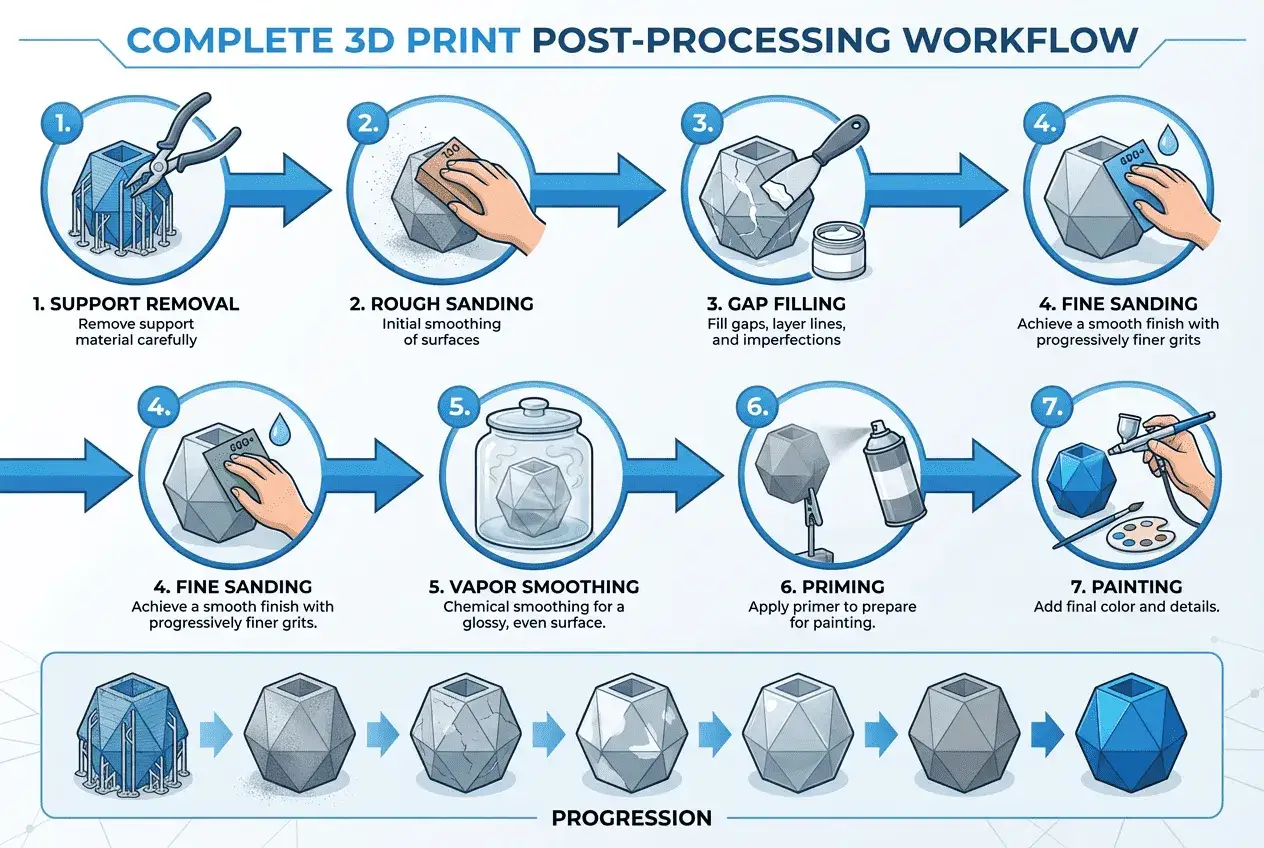
Painting a 3D print is mostly about surface prep, not artistic talent. Knowing how to paint 3D prints well means learning how to remove layer lines, pick the right primer, lay color down in thin coats, and seal the part so the finish survives handling. In practice, the difference between a hobby-looking piece and a polished one is usually only a few careful steps.
The cleanest finishes come from careful prep and thin coats
- Sand first, prime second. Paint will not hide rough layer lines, support scars, or seams.
- Filler primer is useful, but not magic. It helps with texture, yet too much of it can blur fine detail.
- Spray application is the easiest path to an even finish. Brush painting is better for accents and small parts.
- Thin coats beat heavy coats every time. Heavy passes usually create drips, soft detail, and long cure times.
- Clear coat matters. It protects the color and lets you choose matte, satin, or gloss.
What to gather before the first coat
I keep the setup simple, because a clean result comes more from sequence than from buying a pile of specialty products. For a basic finishing kit in the US, I usually expect roughly $25-$60 if I already own a respirator and gloves, or about $50-$120 if I need to buy the safety gear too.
- Sandpaper or sanding sponges in 120-220, 400-600, and optionally 800-1000 grit
- Modeling putty, spot putty, or body filler for seams and deeper gaps
- Isopropyl alcohol, warm water, and a lint-free cloth for cleaning
- Plastic-compatible primer, ideally a spray primer for even coverage
- Paint in the finish you want, usually acrylic or enamel
- Clear coat in matte, satin, or gloss
- Masking tape, a hobby knife, and a small set of clamps, skewers, or a hanger for holding the part
- Gloves and a respirator if you are spraying
If I had to buy only one thing first, I would choose a good primer before I would choose expensive paint. Primer is what turns a rough print into a surface that can actually take color cleanly. Once that base is right, the rest of the process becomes much easier.
Prepare the surface so paint has something to grip
This is the part most beginners try to rush, and it is also the part that changes the final result the most. A painted print is only as smooth as the surface underneath it, so I treat prep as the real finishing step, not a warm-up.
- Remove supports and clean the print. Trim support nubs, scrape off blobs, and check seams where parts were glued together.
- Wash away oils and dust. Fingerprints, sanding residue, and mold-release-like contamination can interfere with adhesion.
- Sand in stages. I usually start around 120-220 grit for major lines or support marks, then move to 400-600 grit to refine the surface. If I want a smoother display finish, I may finish at 800-1000 grit.
- Fill gaps where needed. For split prints, helmets, props, or parts with visible joints, a thin layer of putty or body filler is often the fastest way to hide seams.
- Remove dust again. I use a dry cloth, compressed air, or a tack cloth before primer goes on.
My rule is simple: if I can still feel the defect with a fingernail, paint will probably show it too. On resin parts, I am more cautious around sharp edges because they can round off quickly. On FDM prints, I focus on the highest ridges first and avoid over-sanding corners, because that is where detail disappears fastest. Once the surface is even, the choice of primer and paint becomes much less forgiving in a good way.
Choose primer and paint that match the part
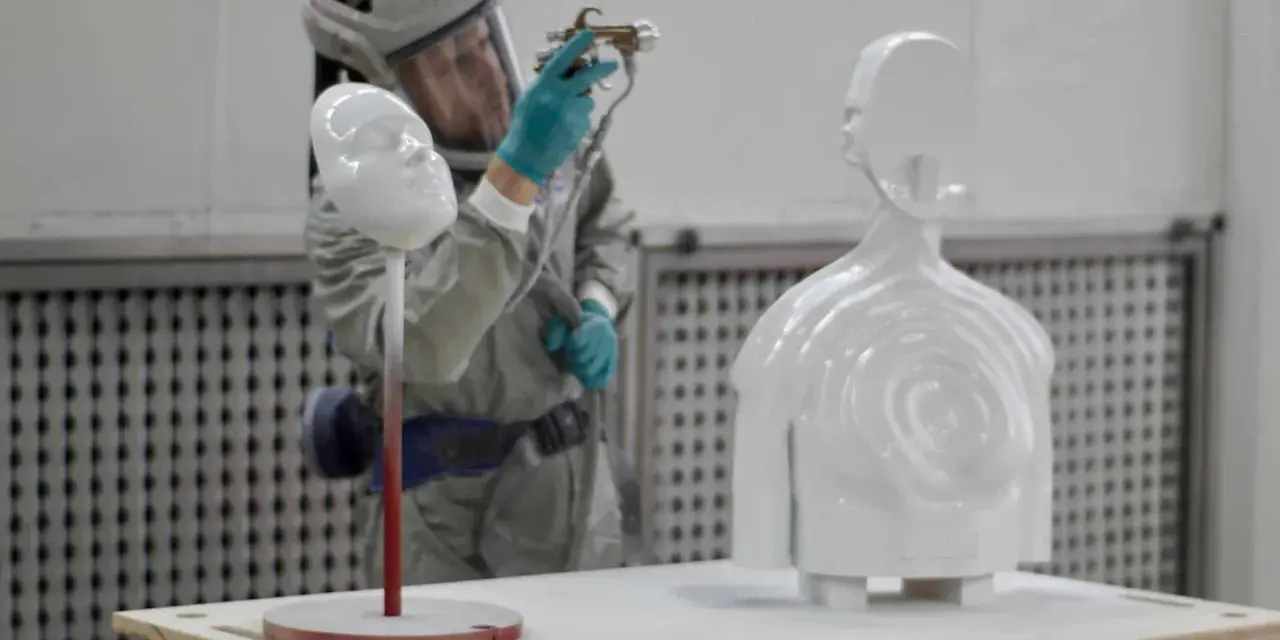
Primer is not there just to make the part look gray. It gives the paint something uniform to bond to, and it also reveals flaws that raw plastic can hide. For most printed parts, I prefer a spray primer because it lays down more evenly than a brushed coat.
| Option | Best for | Main tradeoff |
|---|---|---|
| Filler primer | Hiding layer lines, light texture, rough FDM surfaces | Can soften small details if applied too heavily |
| Standard plastic primer | Smoother prints, parts where detail matters | Does less to hide visible layer lines |
| Acrylic spray paint | Fast work, general hobby use, easy cleanup | Usually less durable than tougher solvent-based finishes |
| Brush-on acrylics | Small details, accents, touch-ups, miniatures | Brush marks appear if the paint is too thick |
| Enamel paint | Harder finish, props, handled parts | Slower drying and stronger fumes |
For a first project, I would usually pair a plastic-safe spray primer with acrylic color coats. That combination is easy to control, dries predictably, and works on most PLA and resin parts. If I want a tougher shell, I may move to enamel, but I do not pretend it is a free upgrade: the fumes are stronger, the drying time is longer, and mistakes are harder to fix quickly.
Apply color in thin coats, not one heavy pass
This is where the finish starts to look intentional. Heavy paint is the fastest way to lose detail, so I work in thin passes and let each layer settle before adding the next one. A smooth result usually comes from two or three light coats, not from trying to cover everything in a single pass.
| Method | Best use | What it does well | What to watch |
|---|---|---|---|
| Spray can | Props, shells, helmets, larger parts | Even coverage and fast application | Overspray and runs if you pause too long |
| Brush | Small parts, accents, detail work | Precise color placement | Visible strokes if the paint is too thick |
| Airbrush | Miniatures, curved surfaces, blended color work | Very thin, controllable coats | More setup, cleanup, and equipment cost |
When I spray, I keep the can moving and stay roughly 6-10 inches from the part unless the product label says otherwise. I want the surface to look evenly damp, not wet enough to sag. Between coats, I wait until the shine drops off; with many hobby aerosols, that is often somewhere around 10-20 minutes, but I still trust the can over any general rule. For hand painting, I thin the paint enough to flow but not so much that it runs into panel lines or edges. If the part is large or awkward, I mount it so I can reach every angle instead of chasing missed spots later.
Once the color is even, the next decision is whether the part needs protection, sheen, or a more realistic surface treatment.
Seal the finish and choose the look you actually want
Clear coat is not optional if the print will be handled, displayed in bright light, or assembled with other parts. It protects the paint, evens out sheen, and gives you control over the final look. I usually think about it in three finishes: matte, satin, and gloss.
- Matte hides small surface flaws best and works well for props, enclosures, and industrial-looking parts.
- Satin is the safest middle ground when I want the finish to look real instead of shiny or chalky.
- Gloss adds depth and a premium look, but it also highlights every bump and repair.
For a part that will be touched or assembled, I usually let the color coat cure overnight before clear coating, then leave the piece alone for another 24-48 hours before heavy handling. Enamel systems may need longer. If I want a worn, technical, or cinematic look, I might add weathering after the base color and before the final clear coat: drybrushing for edges, a wash for recessed details, or subtle chipping on high-contact points. That kind of finish works because the base work is already clean.
The finish itself is the easy part once the paint has something solid to bond to, which is why the next section is mostly about avoiding self-inflicted damage.
The mistakes that ruin a good finish
Most disappointing paint jobs fail for boring reasons. The good news is that those mistakes are predictable, and once I know what to watch for, they are easy to avoid.
- Skipping cleaning. Oils and sanding dust can make paint bead or flake later.
- Using too much filler primer. It can hide layer lines, but it can also erase sharp edges and engraved detail.
- Painting before primer has cured. The surface may feel dry but still be soft underneath.
- Trying to cover in one coat. That is how runs, orange peel, and muddy detail happen.
- Over-sanding corners. Flat areas can take more work, but edges are where the shape starts to disappear.
- Mixing incompatible chemistry without testing. A hot solvent coat over a soft base can wrinkle the finish.
- Ignoring ventilation and gloves. Spray work is cleaner when I protect myself and the workspace from the start.
If I am unsure about a product, I test it on a scrap print first. That small habit saves more time than any shortcut I have ever tried. It also tells me whether the primer, paint, and clear coat actually behave together before I commit to the real part. From there, the only remaining variable is the print material itself.
Adjust the process for PLA, ABS, and resin
The finishing logic stays the same, but the material changes how hard I can push each step. This matters because the wrong sanding or solvent choice can turn a decent print into a soft, scarred surface.
- PLA is the most forgiving starting point for hobby finishing. I sand carefully, use a plastic-safe primer, and prefer acrylic paint unless I specifically need a tougher finish. I avoid aggressive heat or harsh solvents because PLA can deform faster than people expect.
- ABS can handle more sanding and shaping, so it is a little more comfortable when I need to correct seams or refine a prop shell. It still benefits from primer, and it usually rewards patient prep because the surface can be made very clean.
- Resin already starts with finer detail, so I focus less on hiding layer lines and more on removing support marks, dust, and uncured residue. Good washing, proper post-curing, and careful wet sanding make a bigger difference here than heavy filler coats.
If I am painting a decorative PLA model, I lean toward a smooth but lightweight process. If I am finishing a resin miniature, I focus on preserving detail and using paint thin enough to keep that detail visible. If I am working on an ABS prop, I have a little more freedom to correct the surface before color goes on. The method is the same, but the margin for error changes with the material.
The workflow I trust when the part needs to look finished
When I want a reliable result, I keep the sequence brutally simple: clean the print, sand the surface, fill the obvious flaws, prime it, check the surface again, paint in thin coats, and seal it. That order is what makes the difference between a part that looks 3D printed and a part that looks intentionally made.
If the piece is decorative, I spend more time perfecting the surface and choosing the finish sheen. If it will be handled, mounted, or worn, I care more about adhesion, durability, and the clear coat. That tradeoff is usually the smartest place to put your time, because the best paint job is the one that still looks deliberate after the part has been used, not just after it comes off the bench.