Large-format 3D printing is less about brute force than about controlling shrinkage, seams, and assembly from the first CAD decision onward. When I need to 3d print large objects, I start by asking whether the part should exist as one piece at all, because that choice affects material selection, slicer settings, and finishing work more than most people expect. This article breaks the workflow into practical steps so you can plan an oversized print that is realistic, printable, and worth the machine time.
The decisions that matter most before a big print starts
- Warping scales up fast. A part that covers most of the bed needs more thermal control than a small prototype.
- Splitting is often smarter than forcing one piece. Well-placed seams usually beat a risky full-size build.
- Alignment features save time later. Pins, tabs, and mating edges make assembly cleaner and more repeatable.
- Adhesion beats speed. A stable first layer, a brim, and a controlled environment matter more than aggressive print settings.
- Material choice changes the whole job. PLA, PETG, ABS, ASA, PP, and nylon behave very differently at large scale.
What changes when a part gets too large
The challenge grows faster than the model does. A part that uses most of the bed is exposed to bigger temperature swings, longer exposure to creep, and more stress at the corners. Even a print that technically fits can fail if the footprint is so wide that the outer edges cool and pull away before the center has stabilized.
I treat the first layer as a structural event, not a formality. If the base does not stay flat, everything above it inherits that error, and on a long job one small lift can waste hours of machine time. That is why bed cleanliness, adhesion, and chamber stability matter far more on oversized parts than they do on small prototypes.
The other hidden issue is tolerance. The bigger the part, the more seam lines, print-time drift, and fit-up work can show up in the final assembly. Once that is clear, the next decision is whether the part should be printed whole, split, or outsourced, because that choice sets the rest of the workflow.
Choose the right build strategy before you slice anything
| Strategy | Best for | Main risk | When I choose it |
|---|---|---|---|
| One-piece print on a large-format machine | Simple geometry, visible surfaces that cannot tolerate seams | Long failure window, warping, heavy material use | When the part fits comfortably and the machine environment is stable |
| Split into sections and assemble later | Furniture-scale forms, housings, props, architectural pieces | Joint cleanup, alignment work, seam visibility | When build volume is the limit or when I want better print yield |
| Outsource to a service bureau | One-off parts that need unusual materials or a very large envelope | Lead time and cost | When the geometry or material is beyond my own equipment |
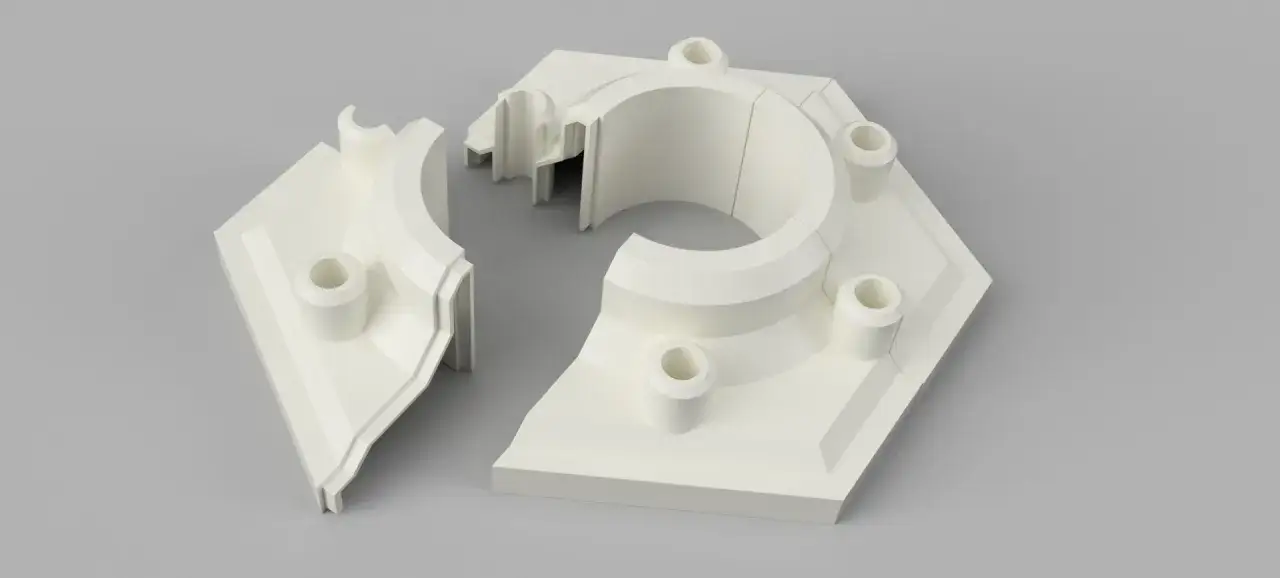
The split-and-assemble route is usually the most practical. A straight cut is the simplest way to divide a model, but I prefer to add registration features when the joint has to locate itself accurately. A registration feature is any shape that forces two printed sections to line up the same way every time, such as pins, slots, tabs, or a stepped seam.
I also try to place seams where the design can hide them, like along a panel edge, a change in curvature, or a natural shadow line. If the part will carry load or be handled often, I design the joint before I design the shell. That keeps the assembly from feeling like a repair job, which is the next reason geometry planning matters so much.
Design the part for size, not just for geometry
The best oversized prints are usually designed with the process in mind. I want the shape to help the printer, not fight it. That means fewer sharp external corners, more gentle transitions, and surfaces that can survive being broken into manageable sections.
| Design move | Why it helps | When I use it |
|---|---|---|
| Split along natural seams | Makes the joint less visible and easier to finish | Panels, shells, props, enclosures |
| Add alignment pins or tabs | Improves fit-up and reduces assembly error | Any multi-part model that must register cleanly |
| Hollow large decorative volumes | Reduces material, print time, and shrink stress | Cosmetic shells, display pieces, prototypes |
| Use fillets and chamfers | Softens corners that like to lift or crack | Large flat panels, boxy housings, sharp edges |
| Use ribs instead of dense mass | Improves stiffness without loading the whole part with plastic | Functional shells and lightweight structural parts |
When the part does not need to be solid, I hollow it and add ribs only where stiffness matters. That cuts weight and lowers shrink stress, but it also means I need vent holes or access points so trapped air and cleanup are not a problem. For structural parts, I do the opposite: moderate walls, controlled infill, and geometry that carries load through shape rather than sheer plastic volume.
Clearance is another detail that gets more important at scale. Clearance is the small gap that lets two parts assemble without binding, and FDM usually needs a little more of it than resin or powder-bed printing. I would rather open a joint slightly and clean it later than force a tight fit that turns into sanding work on every mating surface. With the part laid out this way, the slicer becomes much easier to trust.
Dial in the slicer and machine setup
| Setting | Practical rule | Why it matters |
|---|---|---|
| Brim | Start with at least 3 mm; go wider on warp-prone materials | Gives the base more grip and helps the corners stay down |
| Draft shield or enclosure | Use it for ABS, ASA, PC blends, and tall open-frame prints | Stabilizes ambient temperature and reduces thermal shock |
| Cooling | Keep it conservative on the first layers and on hot materials | Too much fan can pull the part apart as it builds |
| Infill | Stay modest and lean on walls or ribs when possible | Dense infill adds shrink stress and increases warping risk |
| Supports | Use them only when the geometry truly needs them | Support cleanup scales badly on oversized parts |
A brim is extra material printed around the base, while a raft is a sacrificial platform under the model. I reach for a brim first, because it usually gives enough adhesion without making the bottom surface miserable to clean up. For very stubborn materials, a raft can still be useful, but I treat it as a last resort when I can accept more post-processing.
For high-temperature materials, I want a warm, stable environment. A draft shield can help by printing a wall around the object and trapping heat near the part, which is especially useful when I do not have a full enclosure. On very large jobs, I also keep the print speed and acceleration sensible. Faster is not better if it creates vibration, edge lift, or inconsistent layer bonding.
Filament condition matters too. Nylon and other moisture-sensitive materials need to be dry before a long print, because any inconsistency in extrusion is amplified across hours of printing. If the model is still small enough to duplicate on the bed, printing more than one at a time can sometimes help the chamber stay warm, but I do not crowd the plate just to chase that effect.
Material choice changes the risk profile
| Material | Good for | Watch out for |
|---|---|---|
| PLA | Display parts, mockups, large cosmetic shapes | Low heat resistance and limited outdoor durability |
| PETG | General-purpose large prints, functional enclosures, tougher shells | Stringing and some warp risk on wide flats |
| ABS and ASA | Functional housings, parts that need better heat or weather resistance | More warping, stronger need for thermal control |
| PP | Lightweight parts and chemical-resistant components | Very difficult adhesion and high warp sensitivity |
| PC and PC blends | High-strength, higher-temperature applications | Not forgiving on large, full-bed footprints |
| Nylon | Functional parts with good toughness and wear resistance | Moisture sensitivity and a steeper learning curve |
PLA is the easiest route when the part is mostly cosmetic, but it is not my first choice for anything that will live in a hot car or under direct sun. PETG is a solid middle ground, especially when I want better toughness without moving into the more demanding materials. ABS and ASA are better for functional housings and outdoor exposure, but I only trust them on larger work when the printer environment is controlled.
PP and PC sit in a more specialized category. PP can be the right answer when chemical resistance or weight matters, but it is notoriously prone to warping, so I plan for a strong brim and excellent adhesion from the start. PC and PC blends can deliver impressive performance, yet they are a poor bet for oversized prints unless the machine, chamber, and part geometry are all on your side. For many large jobs, the smarter move is not the strongest material, but the one that gives me the most predictable result.
Join and finish the sections so the final piece feels intentional
Assembly is where oversized prints either become convincing or fall apart visually. I do not rely on glue alone if the joint needs to carry load or stay aligned over time. A good joint starts with geometry, then uses the right fastening method to back it up.
| Joining method | Best for | Notes |
|---|---|---|
| Cyanoacrylate or epoxy | PLA and PETG shells | Fast and practical, but the fit has to be good before the adhesive goes on |
| Solvent welding | ABS and ASA | Can produce a strong seam when the fit is clean and ventilation is handled properly |
| Mechanical fasteners | Serviceable assemblies and heavy parts | Screws, bolts, clips, and captive hardware are easier to trust than glue on big loads |
| Heat-set inserts | Threaded joints in plastic | Brass inserts melted into the part let machine screws be reused without chewing up the plastic |
PP is especially difficult to bond, so I plan around mechanical retention first instead of hoping adhesive will save the day. For nylon, I expect the same kind of caution, because the material is strong in use but awkward in post-processing. If a joint is supposed to snap together, I print a small test section first, because a snap-fit that looks fine on screen can be far too tight once real printer tolerances enter the picture.
Finishing is where the seam disappears. Sanding, filler primer, spot putty, and paint all have a role, but they work best when the seam was designed well in the first place. I like to think of finishing as a way to confirm the design, not rescue it. If the parts already fit cleanly, the final surface work becomes lighter and more predictable, which is exactly what oversized printing needs.
The checks I never skip on oversized parts
Before I commit a full spool and a long overnight run, I run the same practical checks. They do not make a difficult print effortless, but they cut the number of avoidable failures in half.
- Measure the model against the real usable build volume, not just the nominal plate size.
- Check where the seams will land and whether they will be visible after assembly.
- Dry the filament if it is moisture-sensitive, especially for nylon or other technical materials.
- Clean the build surface and lock in the first layer settings before starting the print.
- Keep enough material aside for the brim, purge, and one restart.
- Have the sanding tools, adhesive, screws, or inserts ready before the print finishes.
Oversized printing stops being unpredictable when the design, material, and assembly plan all point in the same direction. That is the real trick behind large-format work: keep the geometry honest, reduce thermal stress, and make the final join easier than the print itself. When I approach the job that way, 3d print large objects becomes a controlled process instead of a gamble.