Acrylic looks clean and simple until a strip of tape, a label, or old masking leaves behind a stubborn film. The trick is to remove adhesive from acrylic without turning a clear panel cloudy, scratched, or crazed, and that comes down to choosing the gentlest method that still works. In practice, I care less about speed than about preserving the surface finish, because one aggressive wipe can undo an otherwise good fabrication job.
The cleanest results come from softening the residue, not forcing it off
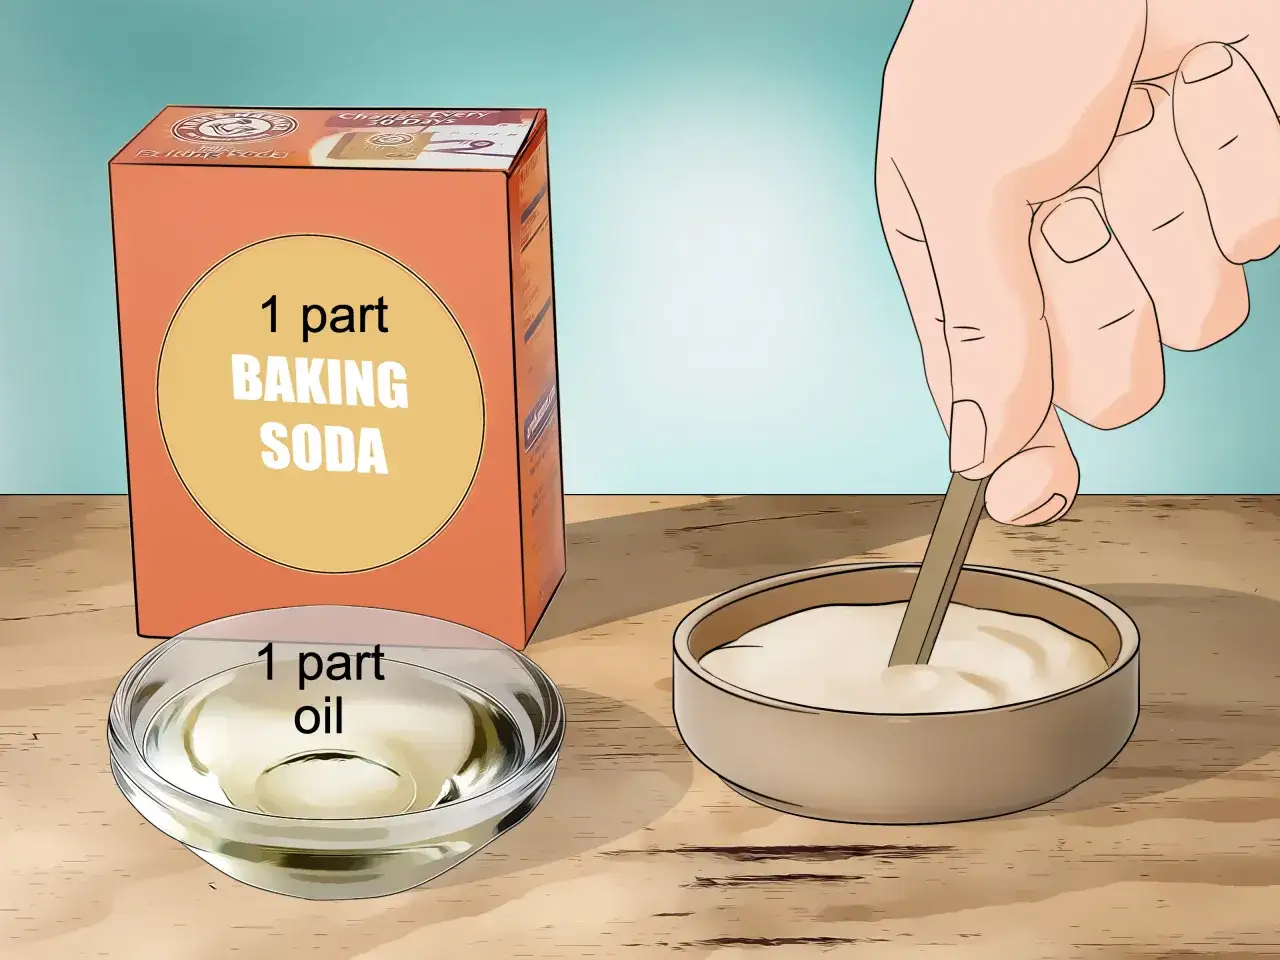
- Start with warm water, mild soap, and a soft microfiber cloth before you touch any solvent.
- Old masking residue and label glue usually respond best to kerosene or aliphatic naphtha used sparingly.
- A hairdryer on low is safer than a heat gun for loosening tape and label adhesive.
- Avoid acetone, lacquer thinner, gasoline, and abrasive pads because they can haze or craze acrylic.
- Test any cleaner on a hidden area or scrap first if the sheet is valuable, stressed, or laser-cut.
- Rinse and dry the panel after solvent use so oily film does not stay on the surface.
Identify the residue before you choose a method
I separate adhesive problems into a few practical categories, because acrylic does not always respond the same way to each one. Fresh sticker residue, aged masking haze, foam-tape glue, and a true bonded joint are all different problems, even if they look similar from a distance. Heat exposure, sunlight, and time usually make the residue harder to remove, while also making the sheet itself more sensitive to damage.
| Residue type | Best first move | What I watch for |
|---|---|---|
| Fresh sticker or label glue | Warm water, mild soap, and a soft cloth | Do not grind dust or grit into the surface |
| Aged masking haze | Kerosene or aliphatic naphtha on a cloth | Rinse quickly so an oily film does not remain |
| Double-sided tape residue | Low heat from a hairdryer, then a gentle wipe | A heat gun is too aggressive for most acrylic work |
| Heavy bond or construction adhesive | Stop and assess whether the bond is mechanical or structural | Some adhesives are better removed by redesign than by force |
My rule: if I do not know what the adhesive is, I assume the sheet is more fragile than the glue. That mindset prevents most mistakes, and it leads naturally into the safest first pass.
The safest first pass on acrylic
Before I reach for any solvent, I clean the area as if the adhesive were sitting on top of dust, not the other way around. Even when water will not dissolve the glue, it removes grit that can turn a simple wipe into a scratch pattern. On a clear surface, that matters more than most people expect.
- Rinse the area lightly with lukewarm water to lift loose dust.
- Mix a small amount of mild dish soap with water.
- Wet a microfiber cloth or other soft lint-free cloth and press it onto the residue for 30 to 60 seconds.
- Wipe gently in one direction with light pressure rather than scrubbing in circles.
- Rinse the area and dry it with a clean soft cloth.
- Repeat the cycle instead of increasing pressure too quickly.
This sounds almost too simple, but it solves more problems than it gets credit for. Fresh adhesive often softens enough that the cloth can lift it in layers, and a second or third pass is still safer than one forceful one. If the residue barely changes after a few passes, I stop and move to a controlled solvent step rather than rubbing harder. That transition is where most of the real cleaning happens.
When a solvent is the right next step
For older adhesive, a mild solvent can be the difference between a clean finish and a damaged panel. The key is to choose a solvent that softens the glue without attacking the acrylic itself, and to keep the contact short and localized. In practice, I prefer the mildest chemical that gives me a visible result within a few seconds.
| Option | Best for | How I use it | Risk level |
|---|---|---|---|
| White vinegar | Light sticker residue and greasy film | Dampen a soft cloth and work on a small area first | Low, but may be too weak for old masking |
| Kerosene | Labels, masking residue, and tacky glue | Use sparingly on a cloth, then wash the area afterward | Moderate because it leaves an oily film |
| Aliphatic naphtha or VM&P naphtha | More stubborn masking haze | Spot test first, then wipe lightly and rinse | Moderate, mainly because of flammability and overuse |
| Hexane | Harder masking adhesive on some sheets | Use only when you already know the sheet tolerates it | Higher, so test before you commit |
I do not treat alcohol as a default cleaner for acrylic. Many sheet makers warn that alcohol can contribute to crazing, especially when the material is stressed, freshly cut, or already exposed to heat. The same caution applies to strong cleaners that seem convenient in a garage but are too aggressive for a finished acrylic panel. If I have any doubt, I test on a hidden corner and check the area again later, because some damage shows up after the surface has had time to react. That delayed reaction is exactly why careful testing matters before the residue is gone and the damage is permanent.
How I handle labels, masking, and tape residue
Labels and masking are where a little patience pays off fast. For tape or sticker glue, I warm the area with a hairdryer on low, keeping it moving so the sheet does not overheat in one spot. I stay far enough away that the acrylic feels warm, not hot, and I avoid a heat gun unless I am working on a scrap piece and already know the material can handle it.
- Warm the adhesive for short bursts, usually 10 to 20 seconds at a time.
- Lift a corner slowly with a fingernail or a soft plastic edge if needed.
- Peel back at a shallow angle instead of pulling straight up.
- If the label tears, rewarm and continue from the new edge.
- Remove the remaining haze with a cloth dampened with vinegar, kerosene, or naphtha, depending on what the residue needs.
- Wash and dry the area once the glue is gone.
Old paper masking is its own problem. Once the adhesive has aged under heat or sunlight, it can bond much more stubbornly to the sheet, and sometimes there is no perfect rescue. In those cases, I try to soften the adhesive rather than peel it dry, because dry peeling creates the most visible marks. If the sheet is critical, I would rather spend an extra ten minutes testing gentle softening than gamble on a hard pull that leaves a permanent witness line. From there, the main risk shifts from the glue itself to the tools and habits used to remove it.
What will damage the sheet faster than the glue
Most acrylic damage during cleanup is self-inflicted. The residue is annoying, but the wrong tool or solvent is what usually creates the real problem. I keep a short list of hard no’s nearby when I am working on clear sheet, because it is easy to forget how little abuse acrylic actually tolerates.
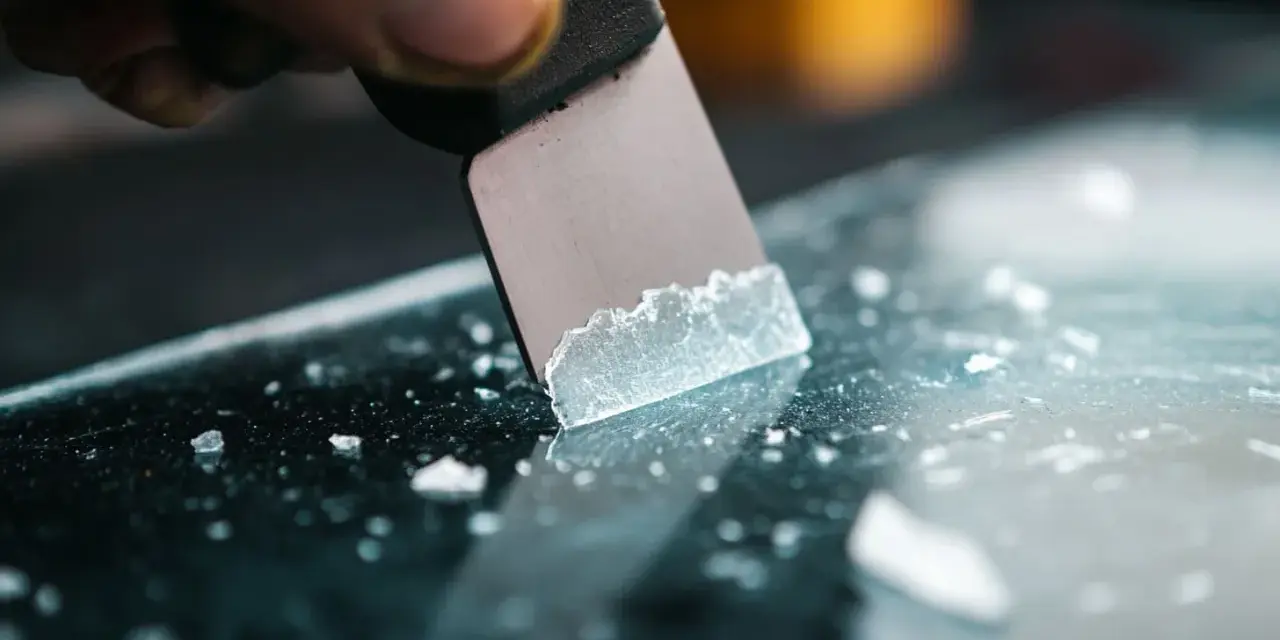
- Metal razor blades and stiff scrapers can leave scratches that are more visible than the original residue.
- Acetone, lacquer thinner, gasoline, benzene, and methyl ethyl ketone can haze, weaken, or craze the surface.
- Abrasive pads and scouring powders create a uniform dullness that is hard to reverse.
- Heat guns can warp the sheet and drive stress cracks into an already vulnerable area.
- Dirty rags drag grit across the finish and turn cleanup into micro-scratching.
One practical detail is easy to miss: acrylic that has been cut, drilled, bent, or otherwise stressed is more likely to react badly than a relaxed sheet. That is why I am especially cautious near edges, corners, and laser-cut openings. If a residue spot sits on one of those high-risk zones, I would rather soften it twice with a safe method than try to shave it off in one move. Careful restraint usually wins here, and it keeps the surface looking like acrylic instead of like a repair job. The same discipline also helps prevent the residue from returning in the first place.
The habits that keep acrylic clear after the residue is gone
Once the glue is off, the smartest move is to make sure the next adhesive job does not create the same cleanup problem. I think about acrylic maintenance and bonding as one workflow, not two separate tasks, because the choice of tape, label stock, or adhesive can determine how much work I do later. If the panel will be bonded, masked, shipped, or displayed, the preparation matters as much as the cleanup.
- Remove masking soon after installation instead of leaving it exposed to heat and sunlight.
- Store unmasked sheet in its original carton or another clean, protected package.
- Test any new cleaner or adhesive on scrap before using it on the finished part.
- Choose tapes and bonding products made for plastics rather than assuming a general-purpose adhesive will behave well.
- Wipe away solvent film immediately so the surface does not dry with an oily trace.
- If you are bonding after cleaning, wait until the panel is fully dry and residue-free before applying the next adhesive layer.
If I had to reduce the whole process to one line, it would be this: soften first, clean second, and only then decide whether a second pass is needed. That sequence protects the clarity people buy acrylic for in the first place, and it is the most reliable way I know to handle sticky residue without turning a clear sheet into a compromised one.