The right adhesive depends more on the plastic than on the metal
- Two-part epoxy is the safest default for rigid parts with a solid fit and small gaps.
- Structural acrylic is often the better choice when you need higher impact resistance or faster handling strength.
- Cyanoacrylate works for small, tight, low-stress repairs, but it is not the most forgiving option.
- PP and PE usually need a specialty polyolefin adhesive or a primer-assisted system.
- Surface prep matters as much as product choice: clean, abrade, and degrease before bonding.
The safest default for most plastic-to-metal repairs
If I had to choose one adhesive family for most rigid mixed-material repairs, I would start with a two-part epoxy. It gives you gap filling, good strength, and enough working time to align the parts properly. That matters when the plastic and metal do not fit perfectly, because the bond line itself becomes part of the joint.
Epoxy is not the universal winner, though. When the joint needs to handle impact, vibration, or faster turnaround, a structural acrylic can outperform a generic repair epoxy. And if the plastic is polypropylene or polyethylene, standard glue usually fails for a simple reason: the surface energy is too low for ordinary adhesives to grip reliably. In other words, the best answer is often a system, not a single tube of glue.
When people ask me what product to buy first, I usually translate the question into three checks: what plastic is it, how much load will it carry, and how much movement will the joint see? Once those are clear, the choice gets much easier. That leads straight into the substrate itself, because the plastic often decides the outcome before the adhesive does.
Choose the adhesive by plastic type, not just by the metal
The metal side is usually straightforward. Steel, aluminum, stainless steel, and painted metal can all be bonded if the surface is prepared correctly. The plastic side is where the real variation starts. Some plastics bond cleanly with epoxy or acrylic; others need a specialty adhesive or a primer before the bond has any chance of lasting.
| Plastic type | What usually works best | What to watch for |
|---|---|---|
| ABS | Epoxy, structural acrylic, or cyanoacrylate for small parts | Good candidate for most general repairs if the fit is clean and tight |
| PVC | Epoxy or acrylic | Clean the surface well if plasticizers or residue are present |
| Polycarbonate | Epoxy or acrylic | Avoid aggressive solvents that can stress-crack the plastic |
| Acrylic | Epoxy or acrylic | Usually bonds well, but edge preparation still matters |
| Nylon | Structural acrylic or specialty adhesive | Moisture can affect consistency, so dry the part before bonding |
| Polypropylene and polyethylene | Polyolefin-specific adhesive or primer-assisted acrylic system | Ordinary glue is usually unreliable without a special formulation |
| Painted or powder-coated metal | Epoxy or acrylic if the coating is sound | If the coating is weak, the bond may fail at the coating layer instead of the adhesive layer |
For the common engineering plastics, epoxy and structural acrylic are usually the first places I look. For polyolefins, I treat the problem as special-case bonding and stop expecting ordinary hardware-store glue to behave like a structural adhesive. Once you have the right chemistry in mind, the next question is not what to buy, but what kind of load the joint will actually see.
What makes one bond stronger than another
Adhesives do not fail randomly. They fail because the joint is asking them to do the wrong job. The biggest difference is between shear and peel. Shear loads slide across the bond line, while peel loads try to lift one edge away. Most adhesives handle shear much better than peel, which is why a wide bonded overlap usually outperforms a tiny spot repair.
Gap filling also matters. Epoxy is usually the best fit when the parts are not machined to perfection, because it can bridge small spaces and still cure into a rigid joint. Cyanoacrylate, by contrast, likes close-fitting parts and thin bond lines. It grabs quickly, but it is not the best choice when the joint has to swallow movement or a rough mating surface.
Flexibility is the other big decision point. A brittle adhesive can be strong on paper and still fail in real use if the assembly vibrates or flexes. That is where structural acrylics and, in some cases, polyurethane systems earn their place. They are not always the hardest, but they often survive the real-world combination of shock, peel, and motion better than a stiff glue ever will.
In mixed-material assemblies, I think in terms of load path first and adhesive second. Once the joint geometry makes sense, surface prep becomes the difference between a bond that looks good and a bond that actually lasts.
How to prepare both surfaces so the bond actually holds
Surface preparation is the part most people rush, and it is usually the part that decides the result. A clean bond line is not the same as a strong one. You want a surface that is free of oil, dust, loose paint, oxidation, and anything else that keeps the adhesive from contacting the substrate.
3M’s structural-adhesive guidance is consistent here: degrease, abrade, and clean when maximum strength matters. For many plastics, a 50:50 isopropyl alcohol and water wipe is a safe starting point. For metal, a stronger degreaser or solvent cleaner may be necessary if the part has machining oil, release residue, or skin contamination. Just be careful with sensitive plastics, because aggressive solvents can damage them.
- Identify the plastic if you can. Unknown plastics are the easiest way to choose the wrong adhesive.
- Dry-fit the parts before mixing anything. Confirm alignment, clamp access, and bond-line thickness.
- Clean both surfaces until they are free of grease and dust.
- Lightly abrade the metal with fresh abrasive so the adhesive has a mechanical key.
- Abrade the plastic only if it can handle it. Some hard plastics benefit from a light scuff; soft or crack-prone plastics do not.
- Remove sanding dust and let solvents flash off fully before bonding.
- Apply the adhesive sparingly and bring the parts together in the correct position immediately.
- Clamp lightly if the product needs it. Too much pressure can starve the bond line and weaken the joint.
That process sounds basic, but it is where the real reliability comes from. When the surface is right, even a mid-range adhesive can perform well; when the surface is wrong, the best adhesive in the world will disappoint. The chemistry comes next, and the differences between adhesive families are bigger than most product labels suggest.
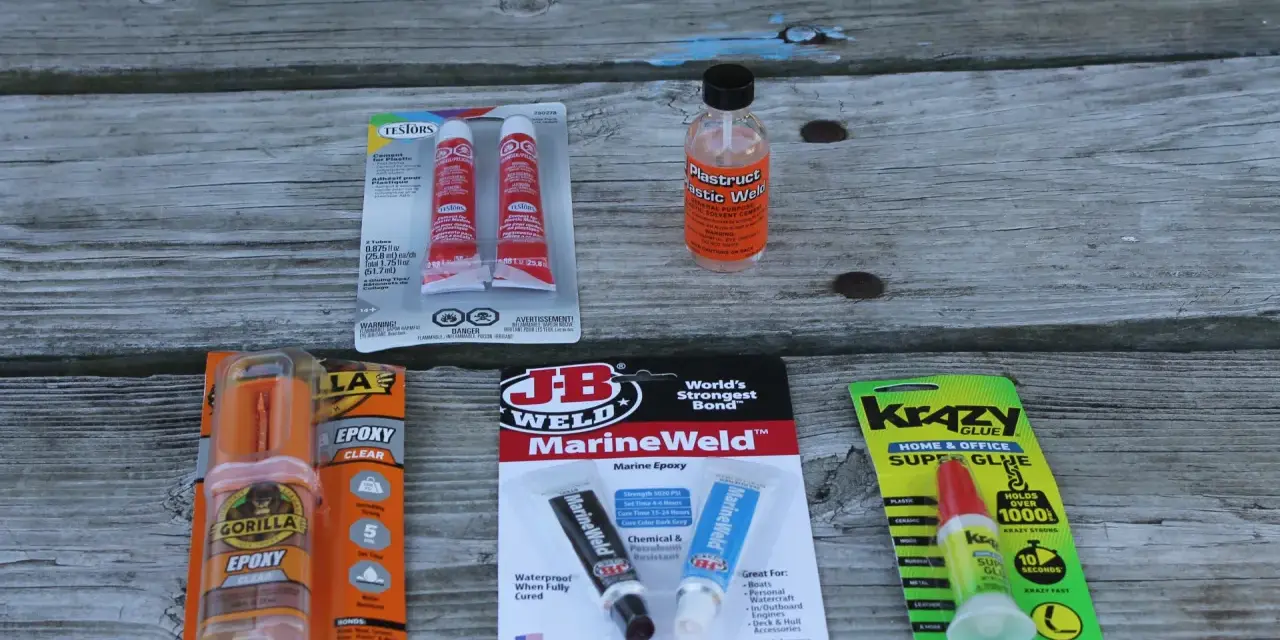
Epoxy, cyanoacrylate, acrylic, and polyurethane compared
When I compare adhesive families for plastic-to-metal work, I focus on strength, speed, flexibility, and tolerance for imperfect surfaces. That usually narrows the decision faster than reading marketing claims ever will.
| Adhesive family | Best use | Main strengths | Main limits | Typical speed |
|---|---|---|---|---|
| Two-part epoxy | Rigid repairs, gap filling, general-purpose mixed-material bonding | Strong, durable, good gap fill, widely available | Can be too rigid for heavy impact or repeated peel loads | Handling strength often in minutes to hours; full cure longer |
| Cyanoacrylate | Small, tight, low-stress repairs | Very fast, easy, convenient for precise fits | Poor gap filling, brittle, weak on PP and PE without special help | Seconds to initial grab |
| Structural acrylic | Tougher assemblies, higher impact resistance, production repairs | Strong across dissimilar materials, good impact resistance, often more tolerant of contamination | Odor and mix/dispense complexity can be a drawback | Some formulas reach most of their strength in about an hour |
| Polyurethane | Parts with movement, vibration, or peel stress | Flexible, good peel and impact resistance | Usually not the first pick for maximum rigidity or heavy gap filling | Varies by formula, often slower than CA |
| Polyolefin-specific adhesive or primer-assisted system | Polypropylene, polyethylene, and other low-surface-energy plastics | Solves the hardest plastic-bonding problem in this category | More specific to the substrate, so product selection matters a lot | Varies by chemistry |
Loctite’s own guidance reflects the same hierarchy: epoxy is the better answer when you need gap filling, while specialty plastic systems are the way to deal with hard-to-bond plastics. My rule of thumb is simple. If the fit is decent and the joint is rigid, epoxy is the default. If the joint needs toughness and speed, structural acrylic often wins. If the plastic is PP or PE, stop guessing and use a product built for that substrate.
That comparison is the theory. The next section turns it into a repeatable workflow you can use in a shop, garage, or production setting.
A simple process that gives repeatable results
I like repeatable bonding processes because they reduce the temptation to improvise halfway through the job. Once the adhesive is mixed or the parts are aligned, you do not want to discover that a clamp is missing or the surfaces were still oily.
- Choose the adhesive family first based on plastic type, load, and environment.
- Confirm the joint design. A wider overlap is usually better than a tiny contact patch.
- Clean the metal and remove any coating, rust, or oil that would weaken the bond.
- Prepare the plastic appropriately. Some plastics need only cleaning; others need a specialty adhesive instead of abrasion.
- Mix the adhesive exactly as directed if it is a two-part system.
- Apply a controlled amount. More adhesive is not automatically better.
- Join and hold the parts steady until the product reaches handling strength.
- Let the joint cure fully before loading it, flexing it, or exposing it to moisture or heat.
The most common failure I see is impatience. People move the assembly too soon, or they test the bond before the adhesive has reached full cure. Another common problem is over-clamping, which squeezes out the adhesive and leaves the joint starved. A thin, complete bond line is usually stronger than a thick, uneven mess.
Once the process is disciplined, the main risks become predictable. That is useful, because it means the remaining failures are usually avoidable mistakes rather than bad luck.
The mistakes that ruin plastic-to-metal joints
A lot of failed repairs look like bad adhesive, but the real issue is usually a bad application. The error is often visible if you know what to check.- Using super glue on PP or PE and expecting it to hold long term.
- Bonding to oily metal or to a loose painted coating instead of the actual substrate.
- Skipping abrasion on the metal when the joint needs more than a cosmetic bond.
- Over-clamping and squeezing the adhesive out of the joint.
- Loading the part too early before the adhesive has fully cured.
- Choosing a rigid adhesive for a joint that flexes, vibrates, or sees peel forces.
- Ignoring temperature and chemicals when the assembly will live outdoors, near motors, or around cleaners and oils.
There is also a design mistake that shows up in repair work and fabrication alike: expecting adhesive to replace a mechanical joint in every situation. In some assemblies, a fastener, clip, rivet, or welded insert still makes sense, with adhesive used to spread load or seal the interface. That is not a compromise; it is often the best engineering choice.
From here, the practical question becomes, “What would I actually choose in a few common cases?” That is the fastest way to turn all of this into a usable decision.
My practical picks for the real cases I see most often
When the details are fuzzy, I like to work from scenarios instead of product slogans. These are the calls I would make in everyday plastic-and-metal bonding work.
- Small indoor repair on ABS, PVC, or acrylic - a two-part epoxy is the safest all-around choice, while cyanoacrylate is fine only if the fit is tight and the load is light.
- Rigid bracket or housing that needs real strength - structural epoxy is usually my first pick because it fills small gaps and gives a durable joint.
- Part exposed to vibration or impact - structural acrylic is often better than a brittle glue because it handles abuse more gracefully.
- Polypropylene or polyethylene component - use a polyolefin-specific adhesive or a system designed for low-surface-energy plastics.
- Outdoor enclosure or moist environment - choose an adhesive with proven moisture resistance and avoid assuming a fast-set glue will survive by default.
- Mixed-material assembly with some flex - polyurethane or a tough structural acrylic may outperform a rigid epoxy.
If I only had one general-purpose answer, I would choose a two-part structural epoxy for most rigid plastic-to-metal jobs. If the joint needed more toughness or faster handling, I would move to structural acrylic. If the plastic was PP or PE, I would not force a generic adhesive to do a specialty job. The adhesive matters, but the substrate and the load decide whether the bond is genuinely reliable. In mixed-material work, the strongest result comes from matching chemistry to the part, not from chasing the boldest claim on the package.