Choosing the right glue for acrylic is less about grabbing the strongest tube and more about matching the adhesive to the joint, the finish, and the load. Clear acrylic often needs a bond that disappears visually, not just one that holds on paper. In most fabrication work, the real decision is between solvent cement, cyanoacrylate, epoxy, and a few hybrid adhesives.
The best acrylic bond comes from matching the adhesive to the joint, not the other way around
- Solvent cement is usually the best choice for clear acrylic-to-acrylic joints because it fuses the edges and leaves a clean seam.
- Cyanoacrylate is fast and useful for small repairs, but it can fog clear acrylic if you use too much.
- Two-part epoxy is better for mixed materials and gap filling, though the bond line is more visible.
- Surface prep matters as much as the adhesive itself; poor edge fit causes bubbles, whitening, and weak joints.
- Temperature and cure time are real variables, especially with solvent cements that need a controlled shop environment.
- Test pieces are worth the time when the part is cosmetic, load-bearing, or made from coated or specialty sheet.
Which adhesive fits acrylic best
When I choose an adhesive for acrylic, I start with one question: do I need the bond to look invisible, or do I need it to tolerate a gap, vibration, or another material? That answer usually narrows the field faster than brand names or marketing claims. For most clear sheet work, solvent cement still leads, but there are legitimate cases where a different chemistry is the smarter call.
| Adhesive type | Best use | Main strength | Main limitation |
|---|---|---|---|
| Solvent cement | Clear acrylic sheets, edges, sign panels, display parts | Creates a nearly invisible seam and a very strong acrylic-to-acrylic bond | Needs good fit and careful handling; not ideal for large gaps |
| Cyanoacrylate | Small parts, quick tacking, minor repairs, temporary alignment | Sets in seconds and is simple to apply | Can fog acrylic and is usually brittle on larger joints |
| Two-part epoxy | Mixed materials, small structural repairs, gap filling | Good gap fill and strong all-around performance | Bond line is visible and clear grades are not as seamless as solvent welding |
| Hybrid acrylic or MS polymer adhesive | Dissimilar materials, flexible bonds, vibration-prone assemblies | More forgiving than brittle adhesives and often better for mixed substrates | Usually not the first choice for a crystal-clear acrylic seam |
| Silicone | Sealing, cushioning, non-structural attachment | Flexible and weather-resistant | Too weak for many true bonding jobs |
That table reflects the way I actually think about acrylic work: first appearance, then fit, then performance. If the part is mostly clear sheet and the joint line matters, I stay close to solvent cement. If the part is a repair, a hybrid assembly, or a hidden bond, the other adhesives can make more sense. From there, the real skill is in using the chemistry correctly.
Why solvent cement still wins for most acrylic-to-acrylic joints
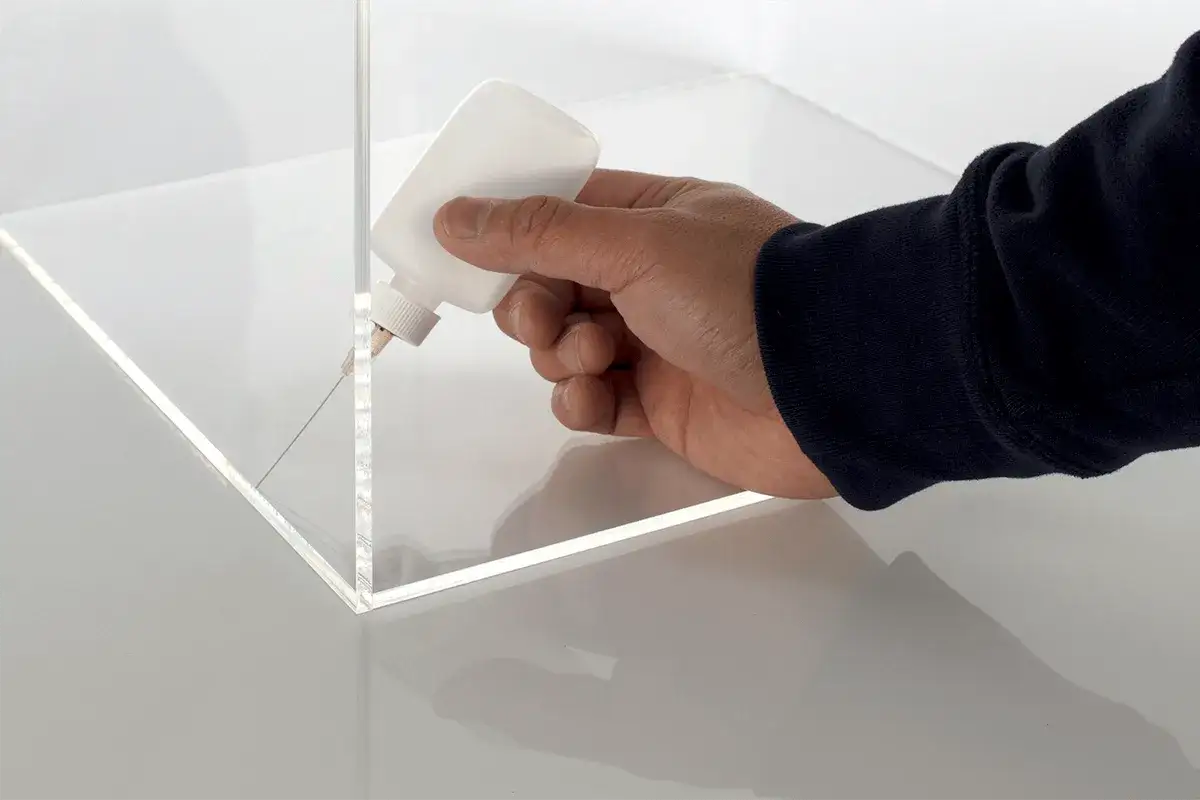
Solvent cement is the closest thing to the “native language” of acrylic bonding. Instead of sitting on top of the material, it softens the mating edges and lets them fuse into one joint when the solvent flashes off. That is why clear fabrication shops still rely on it for displays, signs, guards, lenses, and other parts where the seam should not dominate the finished piece.
ACRYLITE fabrication guidance describes capillary cementing as the most common approach for acrylic sheet, and that matches what I see in practice. Low-viscosity cement can wick into a tight joint and create a strong, transparent bond. If the joint is harder to reach or the fit is not perfect, a thicker cement is often more forgiving because it fills small gaps instead of running out of the seam.When to use each solvent-cement style
- Capillary cement works best when the edges fit tightly and you want the cleanest possible seam.
- Viscous cement is better for difficult joints, small imperfections, or areas that are hard to reach.
- Soak or dip methods are useful in production-style workflows where repeated parts need consistent handling.
For a good solvent-welded joint, fit matters more than force. I prefer clean, square edges, then light clamping or tape to hold the parts in alignment while the cement does the work. ACRYLITE’s fabrication guidance also gives a practical shop window: temperatures around 70°F to 75°F are ideal, and cementing should be avoided below 60°F or above 100°F. That matters more than many people realize, because acrylic joints can behave very differently in a cold garage than they do in a controlled shop.
Timing is just as important. In well-made capillary joints, the initial bond can form in seconds, but high strength typically develops over 24 to 48 hours. That means I treat the first few minutes as alignment time, not load time. If the part is going into service quickly, I still respect the cure window and avoid stress until the joint has had time to build strength.
One practical reference point: medium-bodied acrylic cements such as Weld-On 16 are designed for clear acrylic and are often used where a fast, strong bond is needed. The exact product is less important than choosing the right body and flow for the joint, but that family of cements shows why solvent welding remains the default for serious acrylic fabrication. It is fast enough for production, clear enough for visible parts, and strong enough for real use.
Once the right cement is chosen, the quality of preparation becomes the next deciding factor.
How I prepare acrylic before any adhesive goes on
Most bad acrylic bonds fail before the adhesive even touches the part. The edges are rough, the joint is stressed, or the surface has dust, polish residue, or fingerprints that keep the bond from wetting properly. I usually spend more time on preparation than people expect, because that is where the outcome is made.
- Dry-fit the parts first. The joint should close without forcing. If I have to bend the sheet into place, I usually expect more trouble later.
- Square and smooth the edges. A clean edge gives solvent cement a chance to flow evenly. Rough or rounded edges create bubbles and weak spots.
- Clean lightly, not aggressively. I remove dust and handling residue, but I avoid harsh solvents that can stress or craze acrylic.
- Mask the surrounding area. This reduces visible smears and protects the finish, especially on clear parts.
- Clamp or tape without overloading the joint. Acrylic wants alignment, not crushing pressure.
For tight capillary work, shims can make a real difference. ACRYLITE’s guidance uses .004 inch shims for sheet up to 1/4 inch thick and .008 inch shims for thicker sheet, with shims placed every two feet on long edges. That is the kind of detail people skip and then wonder why the seam looks uneven. The joint needs a consistent gap for the cement to flow, but not a gap so large that the bond loses clarity or strength.
I also pay attention to the first minute after application. In that same guidance, the cement is allowed to soak into the edges for 45 to 60 seconds before the shims come out, then only light pressure is applied for about three minutes. That is not accidental. Too much pressure squeezes out adhesive and leaves a dry joint; too little leaves bubbles or a weak interface.
One exception is flame-polished edges. They can look attractive, but they may craze when they meet solvent cement. If a part has been heat-formed or heavily worked, I think about stress relief and handling before I think about glue. Preparation and adhesive choice are linked, not separate decisions. Once that is clear, the next question is when a different chemistry actually makes more sense.
When cyanoacrylate or epoxy is the smarter choice
Not every acrylic job should be solvent-welded. Sometimes the part is already assembled, sometimes the joint is too small for a capillary bond, and sometimes acrylic is only one material in a larger assembly. In those cases, I move away from the idea of a perfect fused seam and focus on a bond that fits the job.
Cyanoacrylate works for speed, not forgiveness
Cyanoacrylate is useful when I need a fast tack or a small repair. Permabond’s acrylic-bonding guidance makes the key limitation clear: use it sparingly, because excess adhesive can fog the acrylic surface. That is the tradeoff. It sets in seconds and does not need mixing, but it is not the best choice when appearance matters across a long clear edge or when the joint may see flexing.
I think of cyanoacrylate as a precision tool, not a general-purpose answer. It is fine for tiny parts, jigs, hidden supports, or temporary positioning, especially when the bond area is small and the fit is good. For larger visible seams, I prefer something that gives me more working time and less risk of blooming.
Epoxy is better for gaps and mixed materials
Two-part epoxy earns its place when the acrylic needs to bond to metal, wood, or another plastic, or when the joint line is not perfectly tight. Permabond’s technical guidance notes that two-component epoxies can bond acrylic, and transparent grades are often preferred when appearance still matters. That is useful in display work, mixed-material fixtures, and repairs where solvent cement is simply not the right chemistry.
Epoxy is not as visually seamless as solvent welding, and it usually will not disappear in the joint the way a proper acrylic cement can. But it is far more forgiving when the gap is real and the assembly is more important than the invisible seam. That makes it a better fit for many repairs than people expect.
Read Also: Strongest Outdoor Glue - Choose Wisely for Lasting Bonds
Flexible hybrids solve a different problem
Hybrid acrylic adhesives and MS polymers are what I reach for when the assembly needs a little movement, vibration resistance, or compatibility with dissimilar materials. They are not the first answer for a pristine clear seam, but they can outperform brittle adhesives in real-world conditions. If a bonded acrylic panel sits next to metal hardware, thermal expansion and vibration may matter more than perfect transparency.
The practical lesson is simple: if the joint is clear and the fit is good, solvent cement usually wins. If the joint is hidden, mixed, or imperfect, a different adhesive may be the better engineering choice. The next challenge is avoiding the mistakes that make even the right adhesive fail.
Common mistakes that ruin an acrylic joint
Most acrylic failures are not mysterious. They come from using the wrong chemistry, rushing the cure, or assuming that “more adhesive” means “more strength.” In my experience, these are the mistakes that show up again and again.
- Using too much cyanoacrylate and then trying to wipe it clean, which often spreads fogging across the sheet.
- Forcing a bad fit instead of fixing the edge geometry first.
- Applying solvent cement in a cold or overheated shop, which changes flow and cure behavior.
- Touching or moving the part too early before the initial bond is established.
- Over-clamping the joint until the adhesive is squeezed out.
- Bonding over stress, polish marks, or contamination that later becomes a crack path.
| Problem | What usually caused it | What I would change |
|---|---|---|
| Bubbles in the joint | Uneven edge fit or poor clamping | Re-square the edges and use a controlled gap |
| White or cloudy seam | Moisture, fast evaporation, or adhesive contamination | Use fresh cement, improve ventilation control, and keep the work area dry |
| Crazing or fine cracks | Residual stress, heat history, or aggressive handling | Reduce stress, anneal if needed, and avoid flame-polished edges on solvent joints |
| Weak bond | Poor surface fit or the wrong adhesive type | Switch to a better-matched adhesive and improve edge preparation |
If I had to name the biggest hidden issue, it would be stress in the sheet. Acrylic can look fine until a solvent or adhesive reveals the tension already locked into the part. That is why I treat the material, the cut, and the bonding method as one system instead of separate steps. With that in mind, choosing the right adhesive becomes much easier.
The simplest way to choose the right bond for your acrylic part
When I reduce the choice to its essentials, the decision usually looks like this: clear acrylic-to-acrylic seam, use solvent cement; tiny repair or quick tack, use cyanoacrylate carefully; mixed materials or a visible gap, use epoxy or a flexible hybrid adhesive. That is the shortest path to a sensible result, and it avoids most of the damage I see from guesswork.
If the part is structural or cosmetic, I would also test on scrap from the same sheet, thickness, and finish before committing to the real piece. Acrylic is forgiving when the method matches the job and unforgiving when the joint is stressed, rushed, or overhandled. I would rather spend ten minutes testing than repair a cloudy seam for an hour.
For fabrication work, the real standard is not “which adhesive is strongest” but “which adhesive creates the right joint for this acrylic, this finish, and this service condition.” That is the decision that keeps the bond clear, durable, and predictable.