Gluing plastic successfully is less about finding a strong glue and more about matching the adhesive to the resin, joint geometry, and surface condition. In this article I break down which bonding methods work best, why some plastics resist adhesion, how to prep surfaces without damaging them, and what usually goes wrong in real fabrication work. The goal is to help you choose a joint that holds in service, not just one that looks good for a day.
The right bond depends on resin, load, and prep
- Polypropylene, polyethylene, and PTFE are difficult to bond because their surfaces are low energy and do not wet out easily.
- Cyanoacrylates are fast for small, tight-fitting parts, but they are usually not the best choice for gaps or flexing loads.
- Structural acrylics and epoxies are better for stronger, more durable assemblies, especially when plastics meet metal or composite parts.
- Surface preparation usually matters more than brand name adhesive selection.
- Joint design should favor overlap and shear, not peel.
- Full cure time is often much longer than handling strength, so rushing the assembly is a common mistake.
Why some plastics bond easily and others do not
Plastic is not one material. Some resins are easy to wet, some are moderately cooperative, and some seem to repel adhesive on principle. The main reason is surface energy: higher-energy materials let liquid adhesive spread and grip, while low-energy surfaces make the adhesive bead up instead of wetting out.
That is why engineered plastics such as ABS, acrylic, and polycarbonate are usually more forgiving than polyolefins like polypropylene and polyethylene. PTFE sits at the far difficult end of the spectrum. In practice, I treat low-surface-energy plastics as a separate category, not a minor variation, because the wrong adhesive can look fine during assembly and still fail early in service.
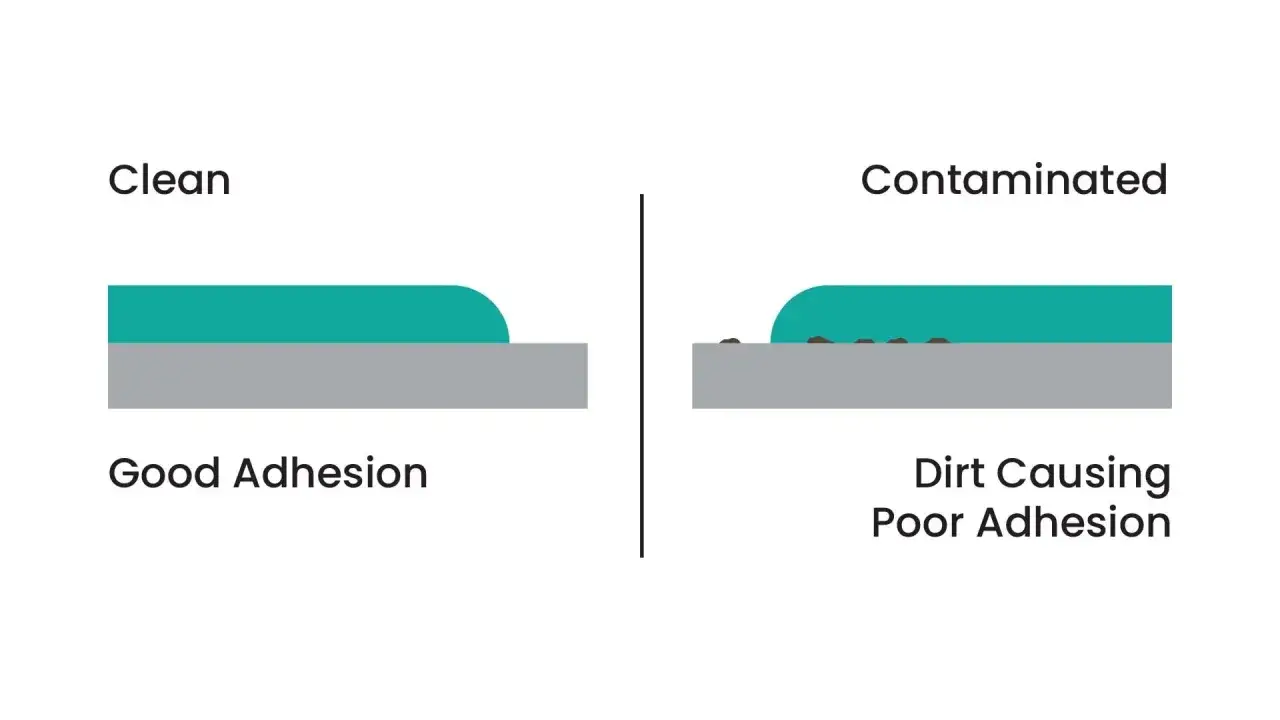
Contamination makes the problem worse. Mold release, finger oils, dust, polishing compounds, and shop residue can block adhesion even on a plastic that would otherwise bond well. Once you understand the substrate, choosing the adhesive becomes much less of a guessing game and much more of a controlled process.
Choosing the adhesive family that fits the job
There is no universal plastic adhesive. The best choice depends on the resin, the bond line, the load type, and how much time you have for assembly and cure. I usually narrow the field by asking one question first: do I need speed, strength, flexibility, or compatibility with difficult plastics?
| Adhesive family | Best used for | Typical behavior | Main strengths | Main limits |
|---|---|---|---|---|
| Cyanoacrylate | Small, close-fitting parts and quick repairs | Sets in seconds to minutes; full cure often takes about 24 hours | Fast, clean, easy to apply | Brittle, weak on gaps, often poor on PP and PE without a primer |
| Structural acrylic | Load-bearing plastic joints and mixed-material assemblies | Working time often runs from a few minutes to about 10 minutes; full cure commonly around 24 hours | Tough, impact resistant, good on many plastics | Needs controlled mixing and sensible bond line thickness |
| Epoxy | Rigid structural bonds, fillers, and dissimilar materials | Work life ranges widely; full cure usually takes hours to a day or more | Strong, gap-filling, chemically resistant | Can be too rigid for parts that flex or move thermally |
| Polyurethane | Parts that see vibration, movement, or thermal cycling | Usually slower than CA, with a more elastic cured bond | Flexible, durable, better at absorbing movement | Lower stiffness than epoxy or structural acrylic |
| Solvent cement | Compatible thermoplastics such as acrylic, PVC, or ABS | Initial grab can be quick; full strength comes after the solvent flashes off and the joint sets | Can create a very clean, fused-looking joint | Only works on compatible plastics and can craze sensitive surfaces |
| UV-curing acrylic | Transparent or light-accessible parts | Cures very fast where light reaches the joint | Excellent for clear assemblies and precise placement | Shadowed areas will not cure properly |
My practical rule is simple: for small, tight parts I start with cyanoacrylate; for stronger assemblies I move toward acrylics or epoxies; for flexible joints I want more elasticity; and for compatible thermoplastics I consider solvent cement first. If the part is polypropylene, polyethylene, or another low-energy resin, I do not assume a generic glue will be enough. I look for an adhesive system designed for those surfaces or a primer that changes the surface behavior.
The chemistry matters, but it is only half the story. Even the right adhesive underperforms if the surface is dirty or stressed, which is why prep comes next.
Surface preparation that actually changes the outcome
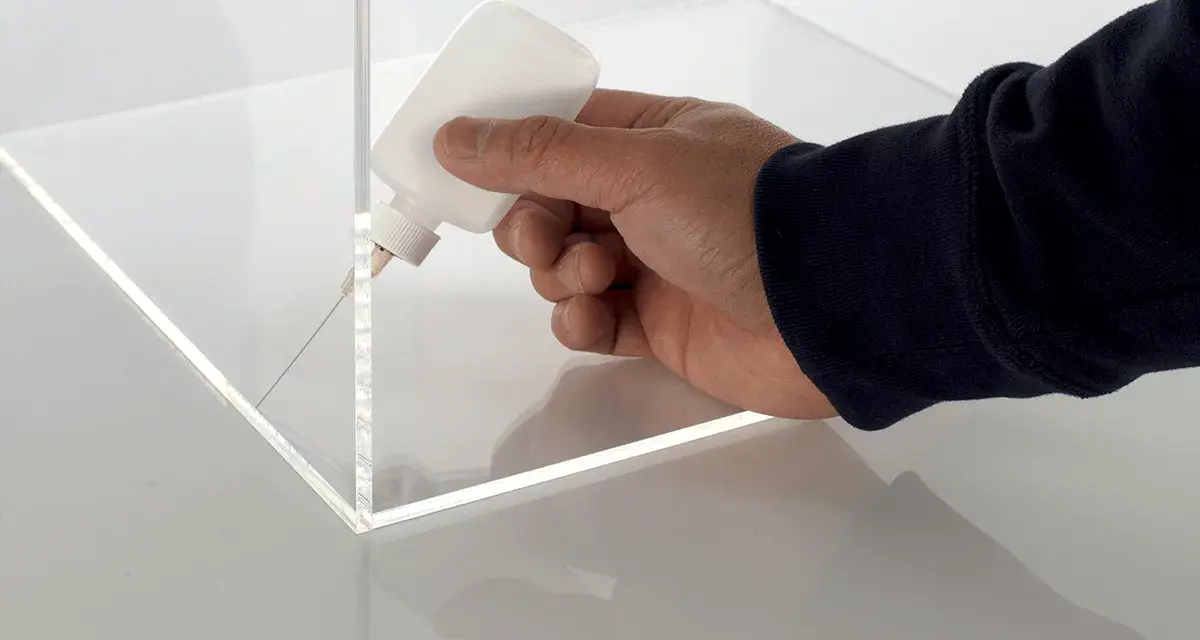
I have seen more plastic bonds fail because of surface prep than because of adhesive choice. The first rule is to clean the part thoroughly with a lint-free wipe and a plastic-safe cleaner, usually isopropyl alcohol when the resin tolerates it. If the part carries mold release, skin oils, or machining residue, the adhesive is fighting a contamination layer instead of the plastic itself.
Light abrasion often helps on rigid plastics because it increases mechanical keying and removes the glossy top layer. That said, I do not abrade blindly. Some plastics scratch easily, some soften with aggressive solvents, and some transparent parts lose the surface finish that the design depends on. The trick is to improve adhesion without creating a cosmetic or structural problem of your own.
- Clean first to remove dust, grease, and release agents.
- Dry completely before applying adhesive so trapped solvent or water does not weaken the joint.
- Use light abrasion only when the plastic and finish can tolerate it.
- Use primer, plasma, flame, or corona treatment for low-energy plastics when the adhesive system calls for it.
- Test on scrap from the same batch whenever the resin is unfamiliar or filled with additives.
Low-surface-energy plastics are the special case. Polypropylene, polyethylene, and PTFE often need a dedicated adhesive or a surface treatment step because liquid adhesive does not naturally spread well on them. Some solvent-based products can also craze certain plastics, especially stress-sensitive acrylics and polycarbonate, so I always check compatibility before I commit a part to production. Once the surface is right, the actual bonding sequence becomes straightforward.
A reliable step-by-step bonding process
For repeatable results, I treat plastic bonding like a controlled process rather than a one-step fix. A good joint starts before the adhesive comes out of the dispenser and ends only after the bond has fully cured.
- Identify the plastic if at all possible. Resin type drives adhesive choice more than appearance does.
- Confirm the load case. A joint that sees shear, peel, vibration, or heat needs different chemistry and geometry.
- Dry-fit the parts so you know the adhesive can fill the gap without forcing the components out of alignment.
- Prepare the surfaces with cleaning, and abrasion or treatment only when appropriate.
- Apply the correct amount. Too little starves the joint; too much can trap bubbles or create a weak, messy bond line.
- Join and clamp lightly if the adhesive needs pressure. The goal is contact, not squeezing all the adhesive out.
- Respect open time and cure time. Handling strength is not the same as full strength.
- Let the joint reach room temperature and full cure before testing it under real load.
I also pay attention to bond line thickness. The bond line is the thickness of the adhesive layer, and it is not something I like to leave to chance. Some adhesives need a controlled gap to perform well, while others want a very thin film. If the assembly is rushed, misaligned, or over-clamped, the joint can fail long before the chemistry has a fair chance to work.
Most failures appear later, when the joint is loaded or rushed, so that is where I look next.
Common failures I see and how to avoid them
When a plastic joint fails, the cause is usually one of a few predictable mistakes. I do not think of these as rare edge cases. They are the ordinary problems that show up when the process is underspecified.
- Wrong adhesive for the resin - A great adhesive on ABS may be a poor choice on PP or PE.
- Surface contamination - Mold release, oils, or dust can stop wetting before it starts.
- Excess clamping force - Squeezing the bond line too hard can starve the joint.
- Peel loading - Plastic joints last longer when the load is spread in shear, not peeled apart at one edge.
- Premature handling - Many adhesives feel firm before they are fully cured.
- Temperature and humidity mismatch - Cold rooms slow cure, and some instant adhesives slow down in low humidity.
One small but important check is the failure mode. If the adhesive peels off cleanly, the surface or chemistry was wrong. If the plastic itself fails before the adhesive lets go, that usually means the bond is stronger than the substrate, which is the outcome I want. The next question is whether adhesive bonding is the best process at all for the part in front of me.
When adhesive is the wrong solution
Adhesives are powerful, but they are not the answer for every plastic assembly. If the part must be serviced repeatedly, taken apart, or exposed to extreme peel and impact loads, mechanical fasteners may be more honest and more durable. If the design uses compatible thermoplastics and wants a fused joint, solvent welding or heat-based joining can outperform glue in both appearance and consistency.
I also push back on adhesive-only designs when the geometry is working against the joint. A thin butt joint loaded in peel is a weak setup no matter how good the adhesive is. In those cases, I would rather redesign the overlap, add a locating feature, or combine adhesive with a mechanical load path than keep betting on chemistry to fix a structural problem.
- Use solvent welding when the plastics are compatible and a fused thermoplastic joint is the goal.
- Use ultrasonic or heat staking when production speed and repeatability matter more than post-assembly repair.
- Use fasteners when serviceability, disassembly, or extreme peel loads are part of the job.
- Use a hybrid joint when you want the adhesive to spread stress and the fastener to carry the primary load.
That specification mindset is what separates a one-off fix from a process you can trust in production.
What I would lock down before production starts
Before I release a plastic-bonding process, I want the important variables written down, not left to tribal memory. The resin grade, the adhesive family, the surface prep method, the clamp method, the cure schedule, and the service environment should all be defined before the first real run.
- Plastic type and grade, including fillers, flame retardants, and recycled content if applicable.
- Adhesive family, not just a brand name.
- Surface prep, including cleaning agent, abrasion step, and any primer or treatment.
- Environmental limits, especially heat, humidity, UV exposure, and chemical contact.
- Load direction, so the joint is designed for shear whenever possible.
- Acceptance test, ideally on real parts or representative scrap, not only on a perfect lab sample.
In practice, gluing plastic is a materials decision, not a guessing game. If you match the resin, control the surface, and design the joint for the load, the bond becomes far more predictable than most people expect. If the part is critical, I would always test it under the same heat, humidity, and vibration it will see in the field before I call the process finished.