The question is simple: can you drill through acrylic without cracking it? Yes, but the result depends far more on setup than on brute force. The wrong bit, too much pressure, or an unsupported exit side is usually what turns a clean hole into cracks, heat marks, or a rough blowout. In the sections below, I break down the bit choices, the setup that prevents damage, the drilling pace that works in practice, and the cases where I would choose a different fabrication method altogether.
The safest answer is yes, but the setup decides the result
- Use the right bit for the job. Step bits work well on thin sheet, while modified twist bits are better for general holes.
- Clamp the sheet firmly. Acrylic cracks when it flexes or jerks, especially as the bit exits the back side.
- Keep heat under control. Slow drilling, chip clearing, and light water cooling help prevent melting and gumming.
- Respect edge distance. Keep the hole center at least 1.5 times the hole diameter from the edge, and leave even more room for bolted joints.
- Deburr both sides. Sharp notches around the hole are small stress risers that can grow into visible cracks later.
Why acrylic cracks when the bit grabs
Acrylic is drillable, but it does not forgive sudden grabbing. I treat it as a material that wants to be scraped and guided, not punched, because friction builds heat quickly and the sheet expands just enough to start binding around the bit. When that happens, chips stop clearing, the hole edge softens or whitens, and the exit side can fracture the moment the bit breaks through.
The biggest mistakes are surprisingly consistent: a bit with too aggressive a point angle, a feed rate that is either too fast or too timid, and a workpiece that flexes while the drill is cutting. If you keep those three variables under control, the job becomes much more predictable. That leads straight to the next question: which bit should you actually use?
Which drill bit works best for your hole size
There is no single universal acrylic bit. The right choice depends on sheet thickness, hole diameter, and whether you care more about speed or a polished edge. For thin sheet, I usually prefer a step drill; for general-purpose work, a modified twist bit is dependable; for large holes, I move to a hole saw or circle cutter rather than forcing a standard bit to do everything.
| Bit type | Best use | Why it works | Watch out for |
|---|---|---|---|
| Modified twist bit | General holes in medium or thicker sheet | A flatter point and moderate rake reduce grabbing and let the bit scrape instead of gouge | Needs controlled speed and a firm setup; a stock metal bit is often too aggressive |
| Step drill bit | Thin sheets and clean, accurate holes | It enters gradually, so it is less likely to bite or chip the edge | Less useful on thick stock, where chip removal becomes harder |
| Conical bit | Thin sheet, corrugated sheet, and tubes | It makes a slightly tapered hole that helps prevent exit-side chipping | The hole is not perfectly straight-wall cylindrical |
| Hole saw with fine teeth | Larger-diameter holes in thin material | It removes material efficiently without forcing a twist drill to do too much | Needs low speed, good cooling, and regular chip clearing |
| Circle cutter or fly cutter on a drill press | Holes over 1 in. / 25.4 mm | Useful when the hole is too large for a standard twist drill | Never use it freehand with a hand drill |
If I am modifying a standard bit, I keep the cutting edge flatter than a metal bit and reduce the point angle so it enters and exits cleanly. That small change matters more than people expect. The bit should remove chips, not wedge the sheet apart.
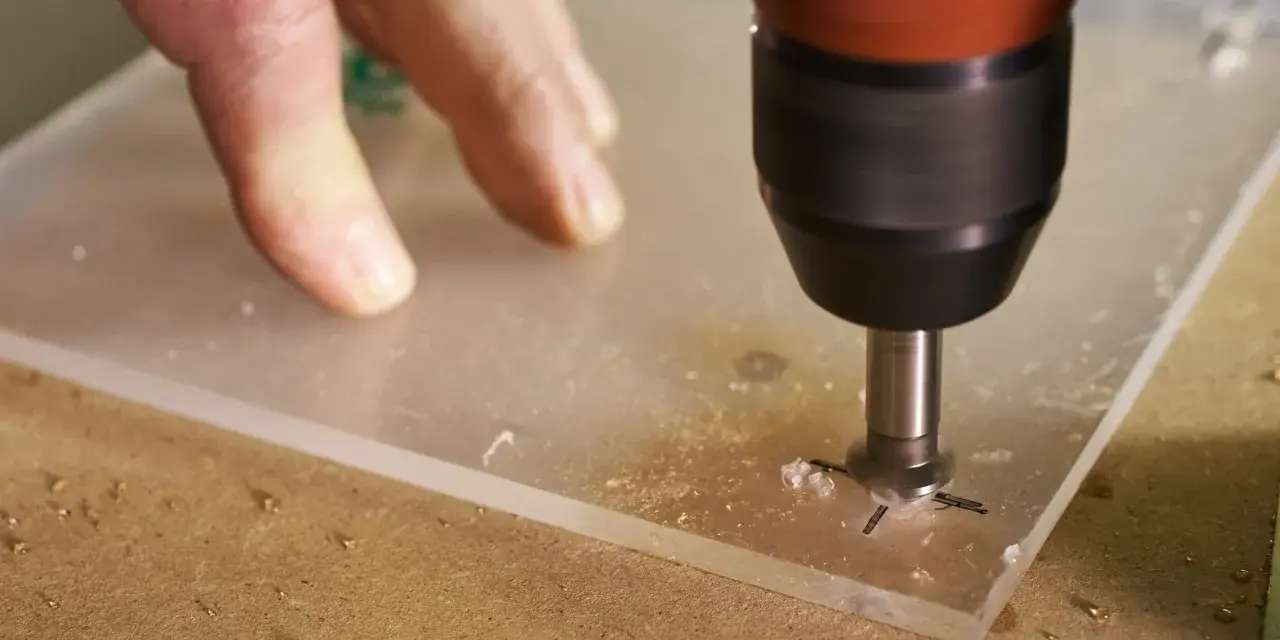
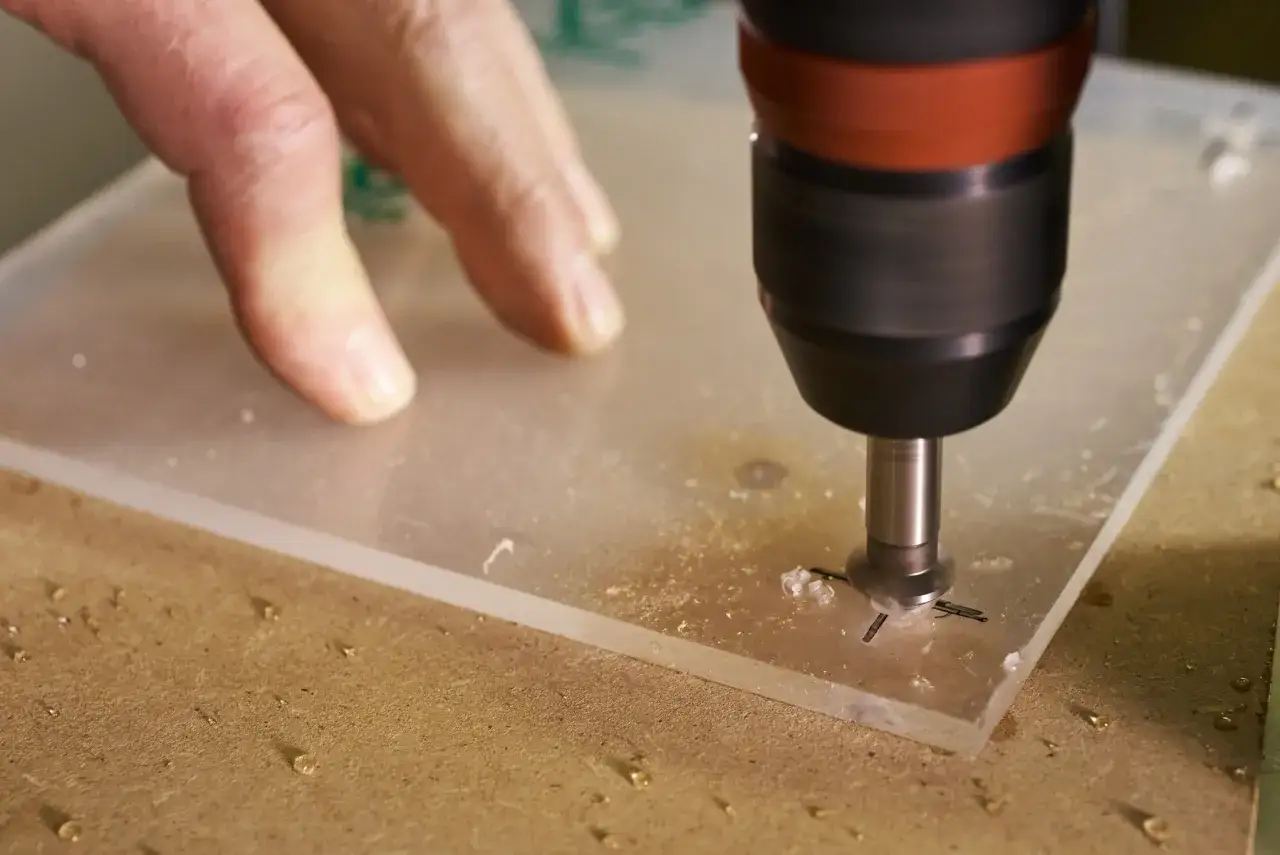
How I set up the sheet before the drill starts
Most crack prevention happens before the trigger is pulled. I leave the masking film on, mark the hole with a grease pen or permanent marker, and clamp the sheet to a flat, clean base. A piece of MDF works well as backing because it supports the exit side without introducing sharp edges, but another plastic sheet also works if it is flat and solid.
Placement matters too. For general hole work, I keep the hole center at least 1.5 times the hole diameter from the edge; for point fastening, I allow at least 2 times the bolt diameter for the bolt hole itself. That extra room is not wasted space - it gives the part room to move with temperature changes and reduces the risk of a split edge later on.
I also run a practice hole on scrap if the hole size or the bit is unfamiliar. That small test tells me more about speed and chip behavior than guessing ever will. Once the sheet is clamped and the layout makes sense, the actual drilling becomes much easier to control.
My drilling routine for a clean hole
- Start with low speed and light pressure so the bit can establish the cut without skating or biting.
- Let the chips clear. If the hole is deep or the sheet is thick, use peck drilling, which just means lifting the bit out periodically to clear waste and reduce heat.
- Keep the feed steady. If the hole looks crumbly, the feed is probably too fast or the RPM too low; if it starts to melt, the RPM is too high or the feed is too slow.
- Cool the cut when the stock is thick or the hole is large. A light water mist is usually enough for smaller shop jobs, and it also helps as a cutting lubricant.
- When the hole is 1/2 in. or larger, or when the hole depth exceeds the drill diameter, I treat cooling as part of the process rather than an optional extra.
- Ease off as the bit approaches the exit side. I never force the final breakthrough, because that is where many clean-looking holes split.
- Deburr both sides after drilling. A countersink or fine scraper removes the small notches that can start cracks later.
That routine sounds simple, but the order matters. Acrylic rewards a calm, continuous cut, not a dramatic one. Once the sheet gets thicker than about 5 mm, I pay even closer attention to cooling because the material stops forgiving heat buildup very quickly.
What the hole is telling you when something goes wrong
When acrylic misbehaves, the debris and edge finish usually tell you why. I prefer to read the hole before I change the tool, because the fix is often a speed or support problem rather than a completely different bit.
| Symptom | Likely cause | What I change |
|---|---|---|
| Cracks at the entry edge | The bit is grabbing, the point angle is too aggressive, or the feed is too heavy | Use a plastics-friendly or step bit, reduce pressure, and start the cut more slowly |
| Blowout on the exit side | No backing board or the bit breaks through too fast | Add MDF or another solid backing and ease off near breakthrough |
| Cloudy or melted edges | RPM is too high, feed is too slow, or chips are not clearing | Lower speed slightly, keep the feed moving, and use water cooling |
| Crumbly chips and a rough cut | Feed is too fast or RPM is too low | Slow the feed, raise the speed a little, and check chip shape again |
| Oval hole or chatter marks | The sheet is flexing or the drill setup is vibrating | Clamp the work more tightly and support the area closer to the cut |
If the chips are smooth and continuous, I know I am close to the right zone. If they turn powdery or gummy, I do not keep drilling and hope for the best. I stop, correct the speed or feed, and try again on scrap if needed.
When a different approach is the smarter call
There are jobs where I stop thinking like a driller and start thinking like a fabricator. Large holes over 1 in. are often easier with a circle cutter on a drill press, not a hand-held drill. I would not run a circle cutter freehand; it belongs in a drill press with the sheet firmly clamped.
Holes near the edge need extra care, and repeated fastening calls for better hardware rather than simply tightening harder. For drilled holes that will carry bolts, I like to leave room for thermal movement because acrylic expands more than metal. If I know the part will be taken apart repeatedly or see shock loading, I would rather use threaded metal inserts than rely on tapped acrylic threads alone. For deep holes, especially in thicker material, I also pay attention to coolant and chip clearing from the start instead of trying to rescue the hole later.
In other words, acrylic is usually drillable, but not every hole deserves the same method. If the geometry is awkward, the panel is thin, or the hardware load is high, changing the design is often the cleanest solution. That is the difference between a part that looks fabricated and a part that looks improvised.
What I would do on a real acrylic job
If I had to drill acrylic today, my checklist would be short: keep the masking film on, clamp the sheet to a solid base, pick the gentlest bit that matches the hole size, and slow down before the bit enters and exits. Those four choices prevent most of the failures I see in practice.
After that, I would inspect the chip shape, not just the hole. Smooth chips and a clean edge tell me the cut is balanced; melting or chatter tells me the speed, feed, or support still needs work. Once the hole is finished, I deburr it, clean the shavings, and avoid overtightening the hardware so the panel stays stress-free after installation.
That is the version of the process that consistently works in the shop: quiet, controlled, and a little slower than people expect. It is not glamorous, but it is usually the difference between a clean acrylic part and a cracked one.